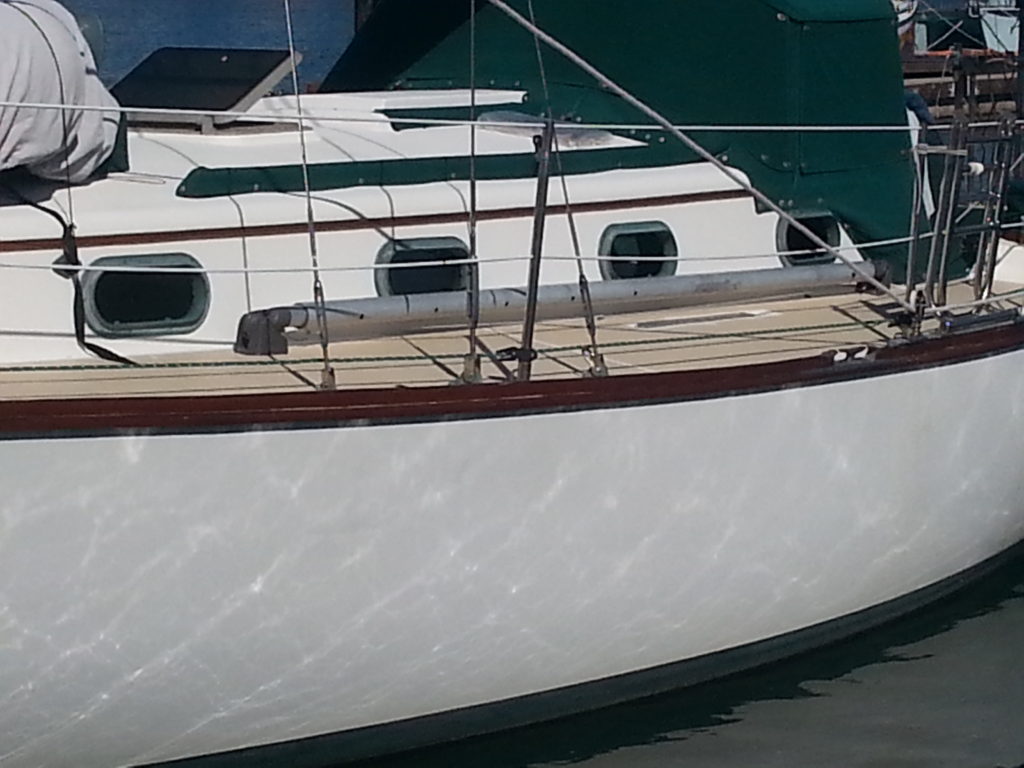
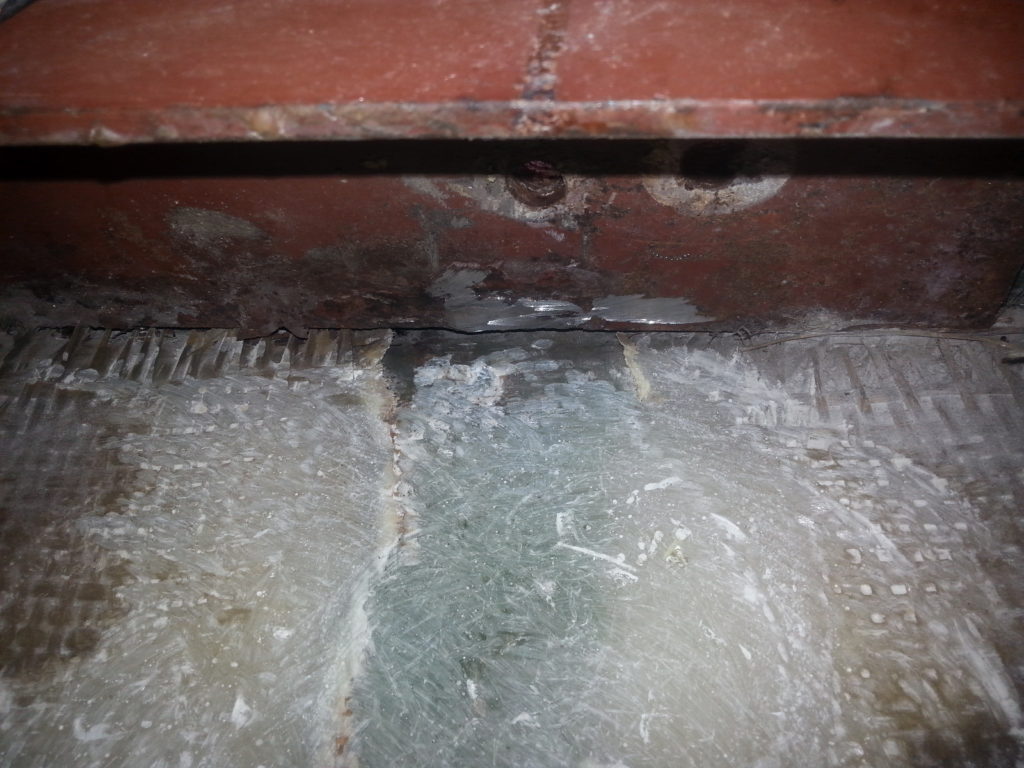
Shroud overview. If you look close you might see the bulge in the topsides. 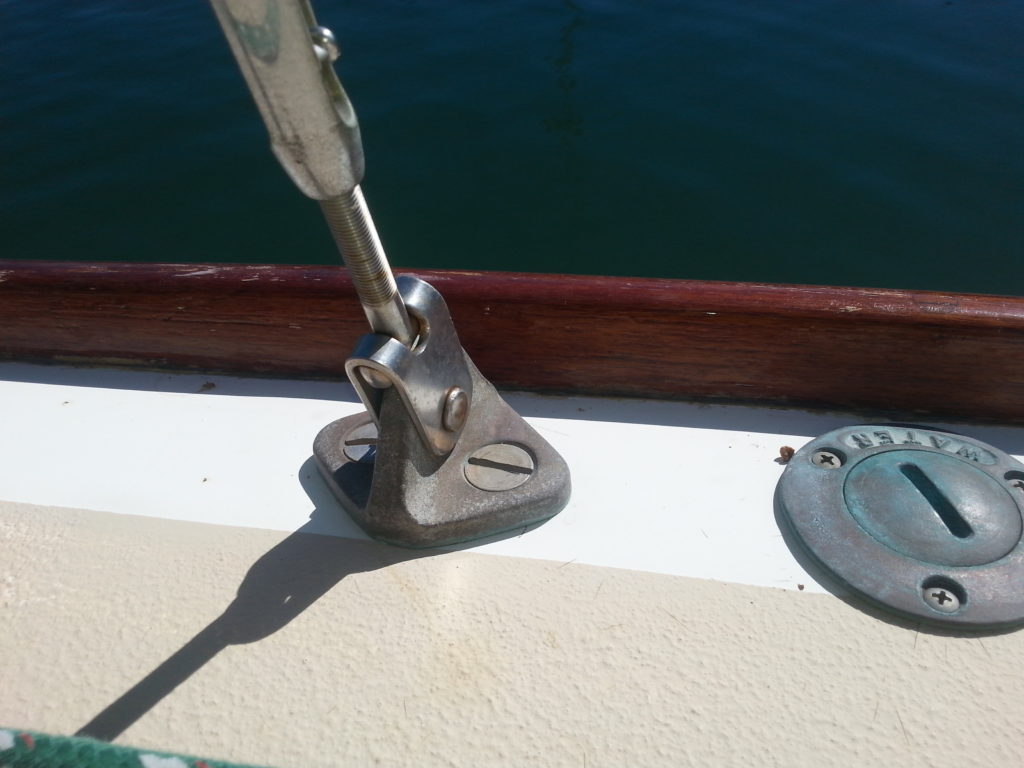
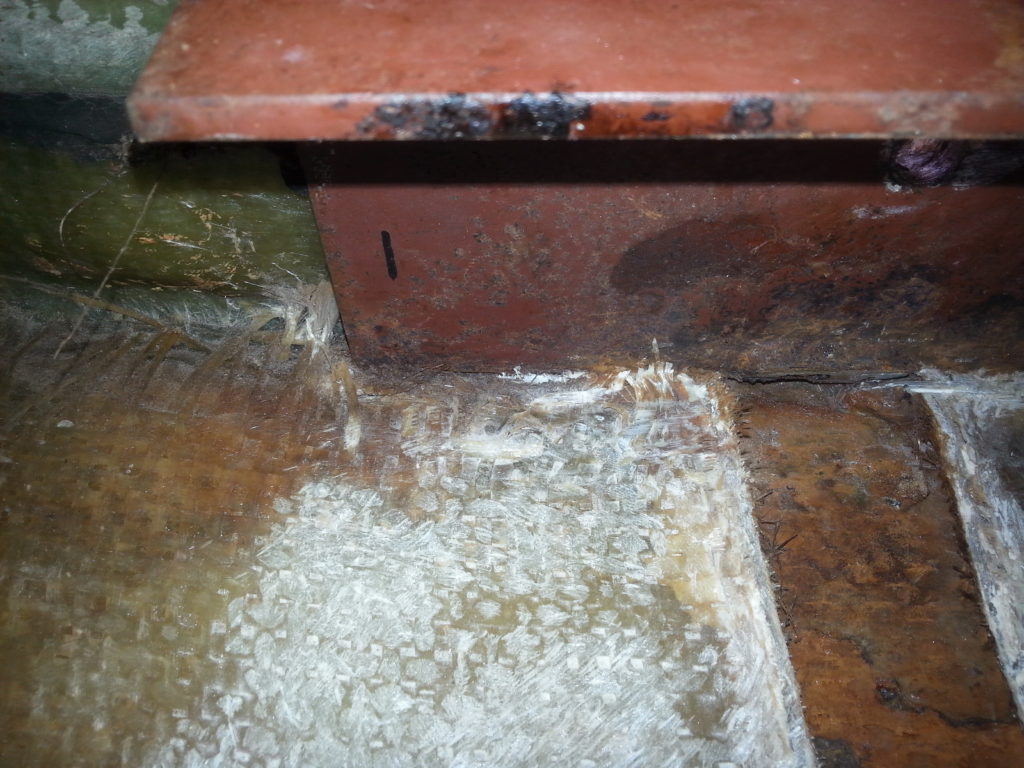
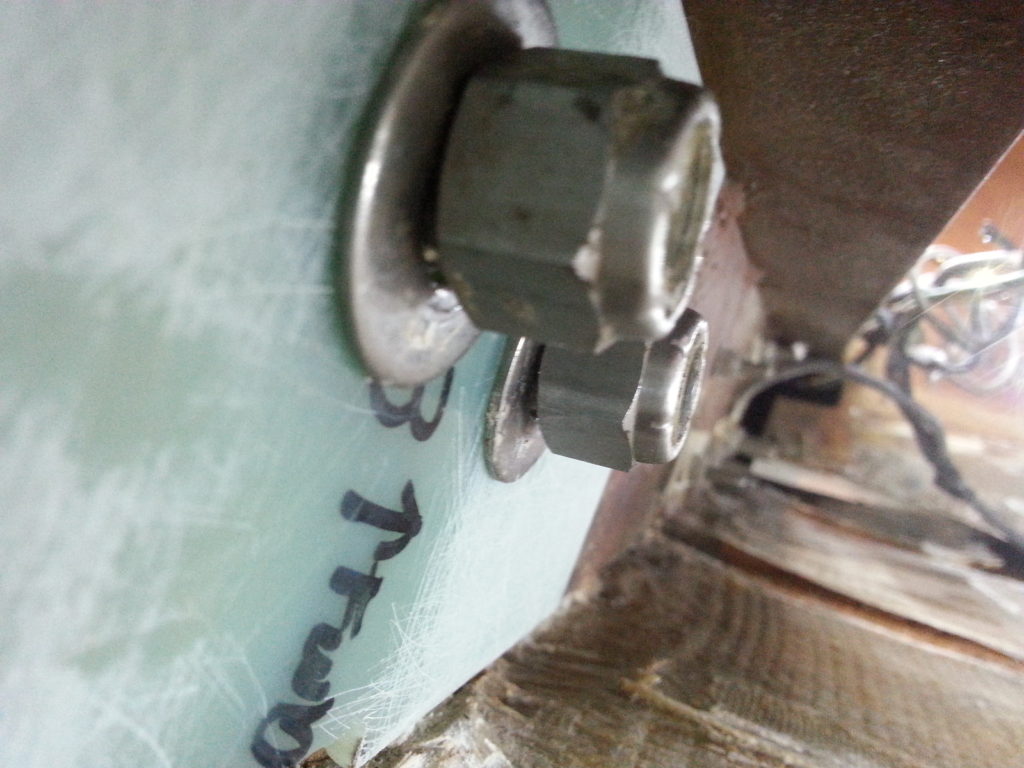
Shroud pad-eye 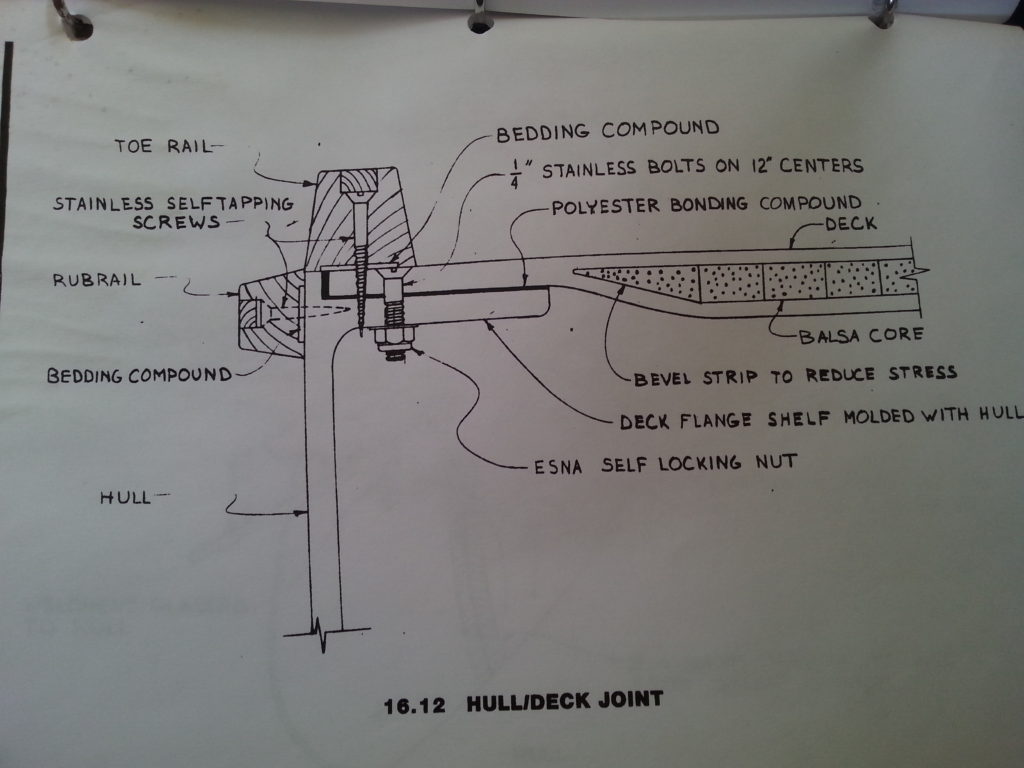
Hull to deck joint 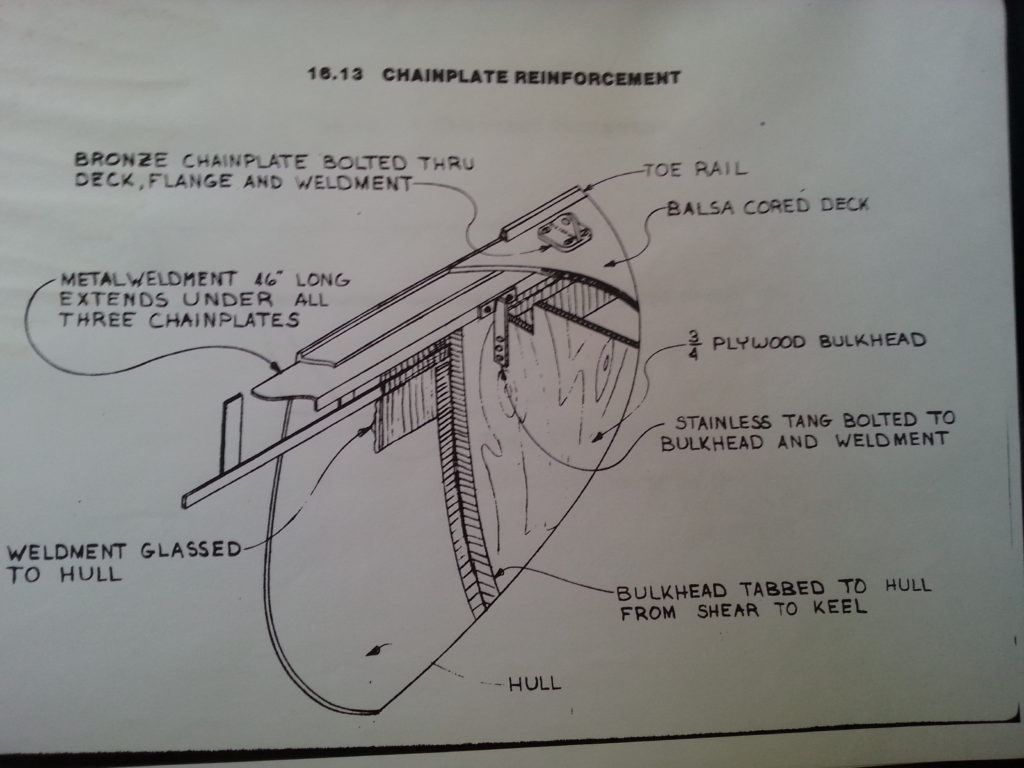
The weldment is mild steel
We have been watching these little tumorous bumps grow on the topsides for some time. It’s a common problem with the Cape Dory design, which the surveyor even checked when we bought the boat. Unfortunately, we’ve seen the bumps slowly growing over the last year or so. Time to think about what is causing the problem and find potential solutions.
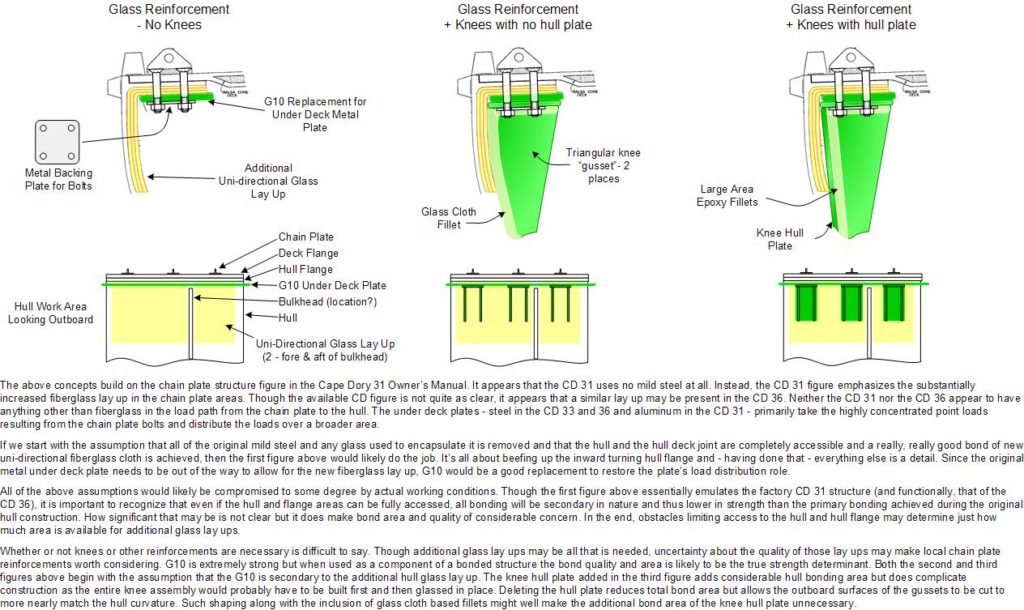
The pictures show the Cape Dory shroud attachment system design. The pad-eyes are bolted through the deck and a steel backing plate. The backing plate has a steel “weldment” attached which is glassed to the hull. The design is a bit unconventional, but does have some advantages.
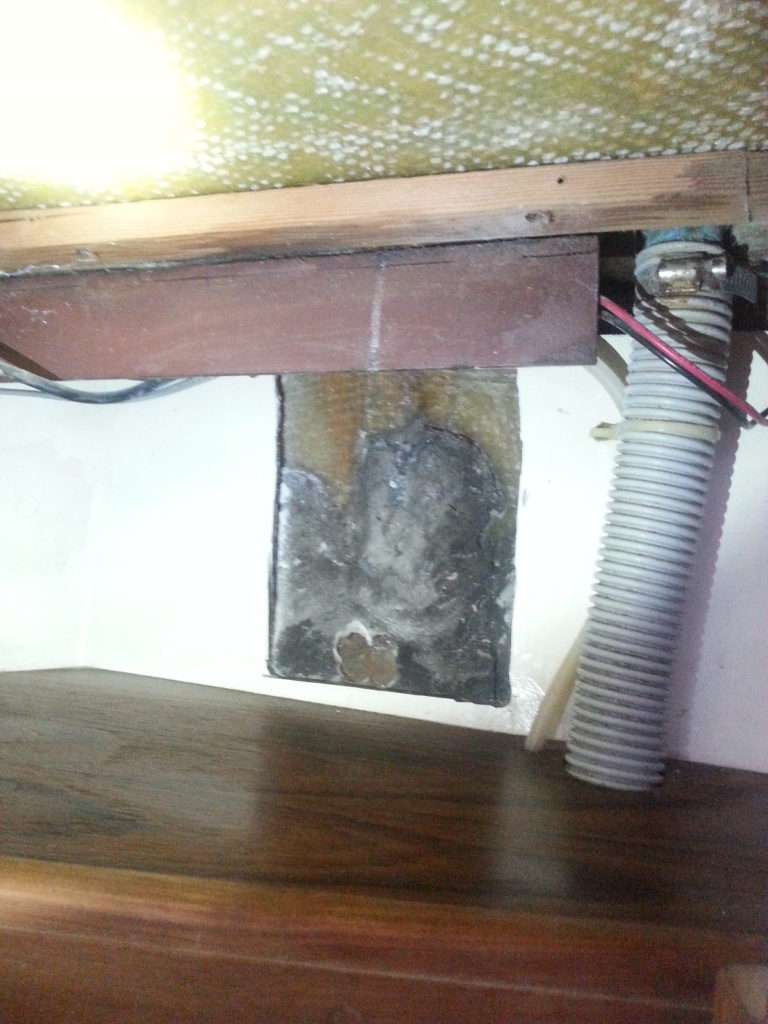
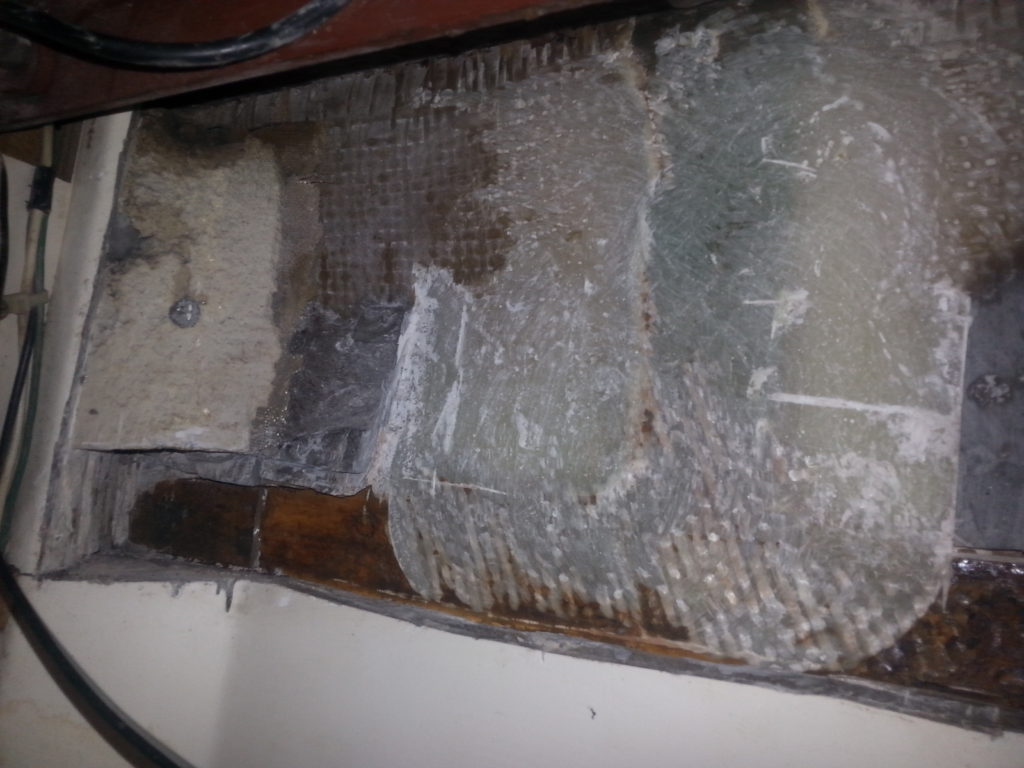
The problem we are experiencing involves the mild steel weldment – which is embedded in fiberglass – beginning to rust. When steel rusts, we learned, it expands anywhere from 4 to 10 times its original volume, and if it is encased, it exerts tremendous pressure.
I did some exploratory surgery in order to better understand the problem. Have a look at the pictures.
Forward lower, hull liner in head partially removed 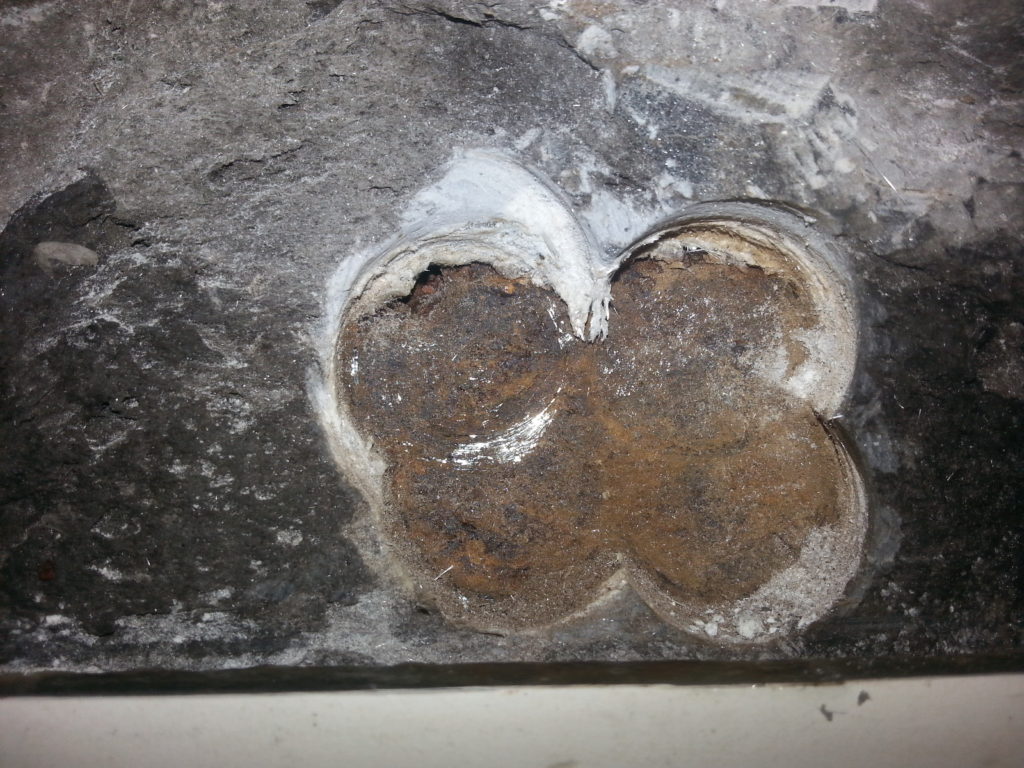
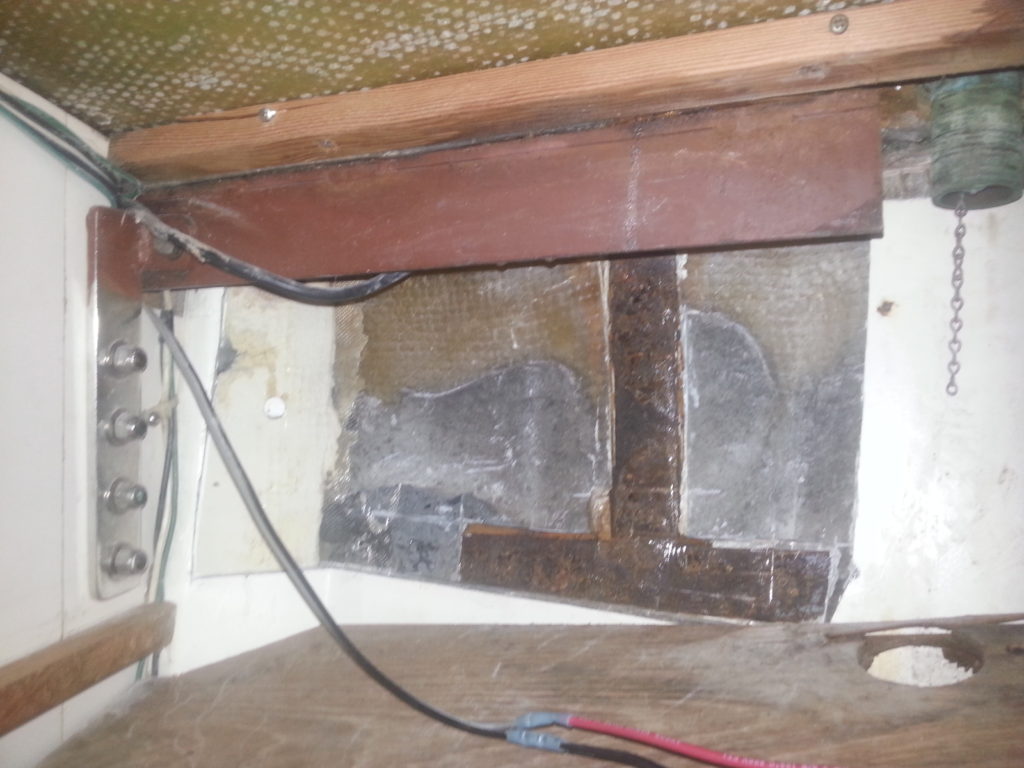
Steel weldment exposed 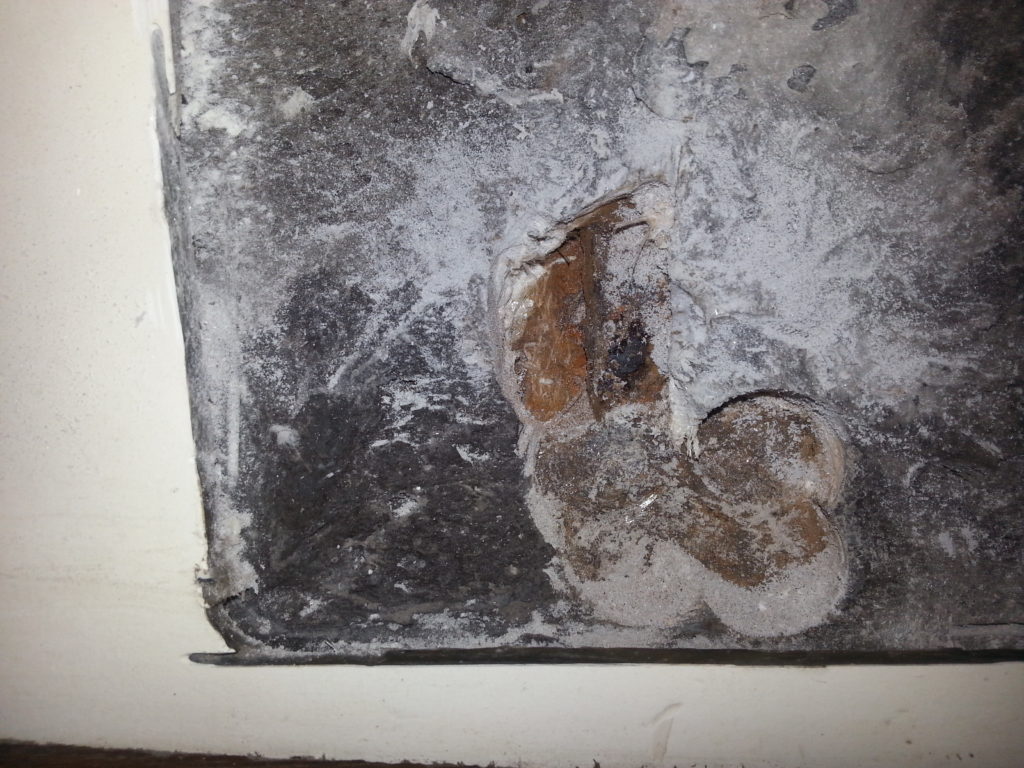
Exposing the edge 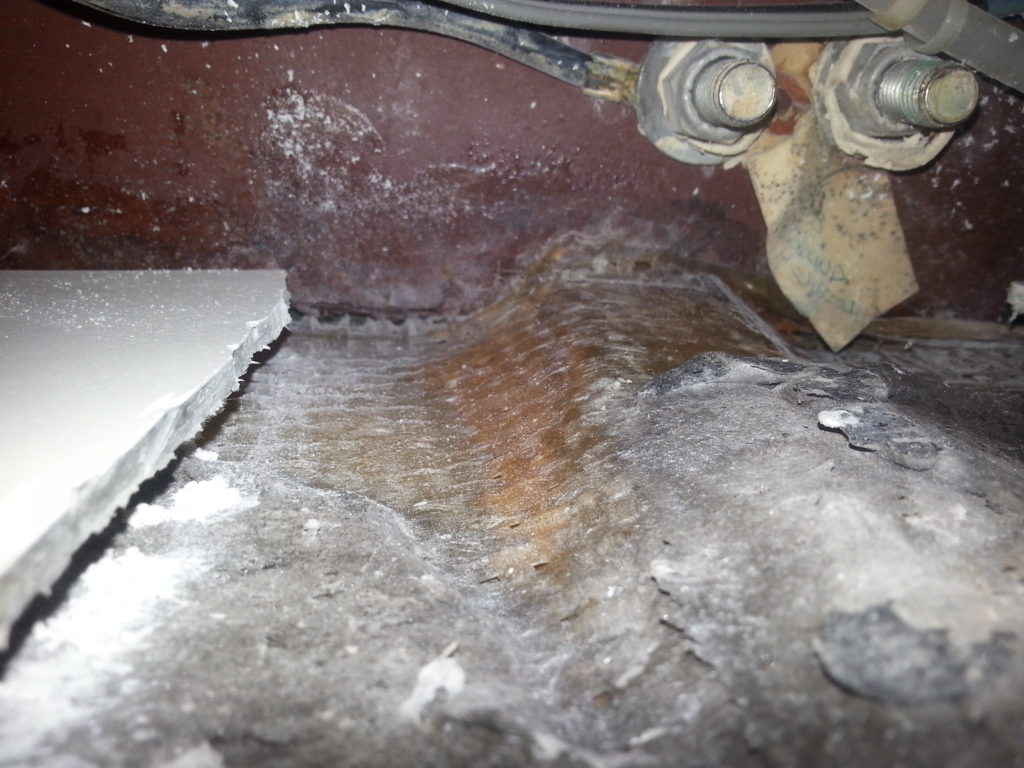
Looking up to the backing plate under the deck 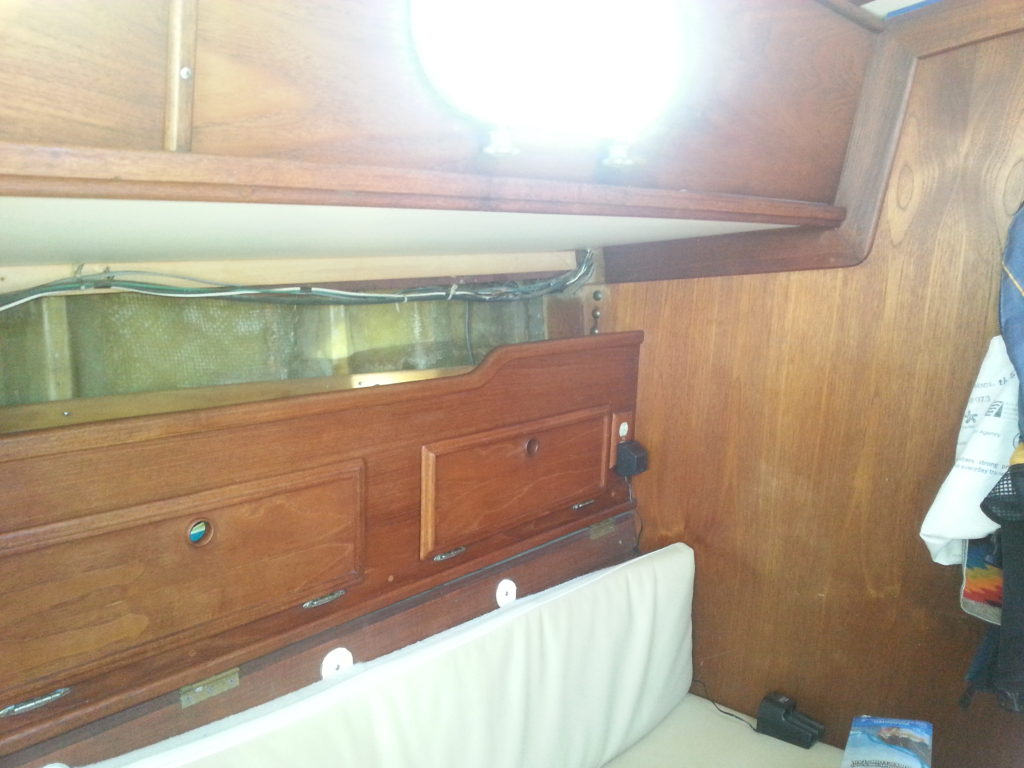
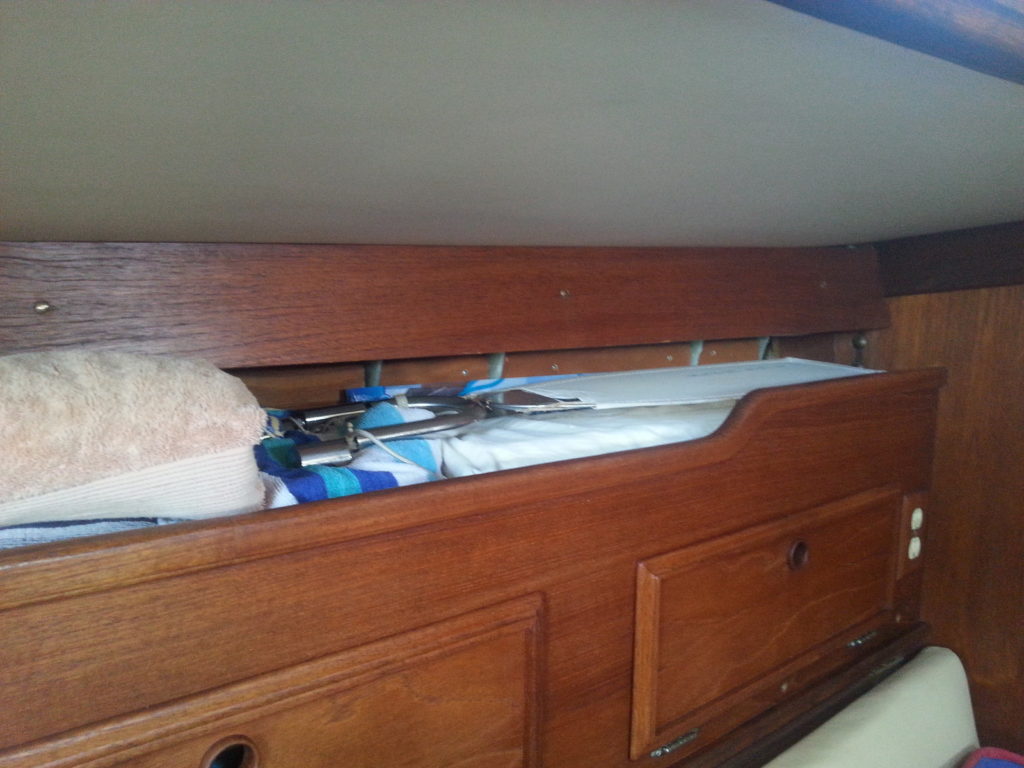
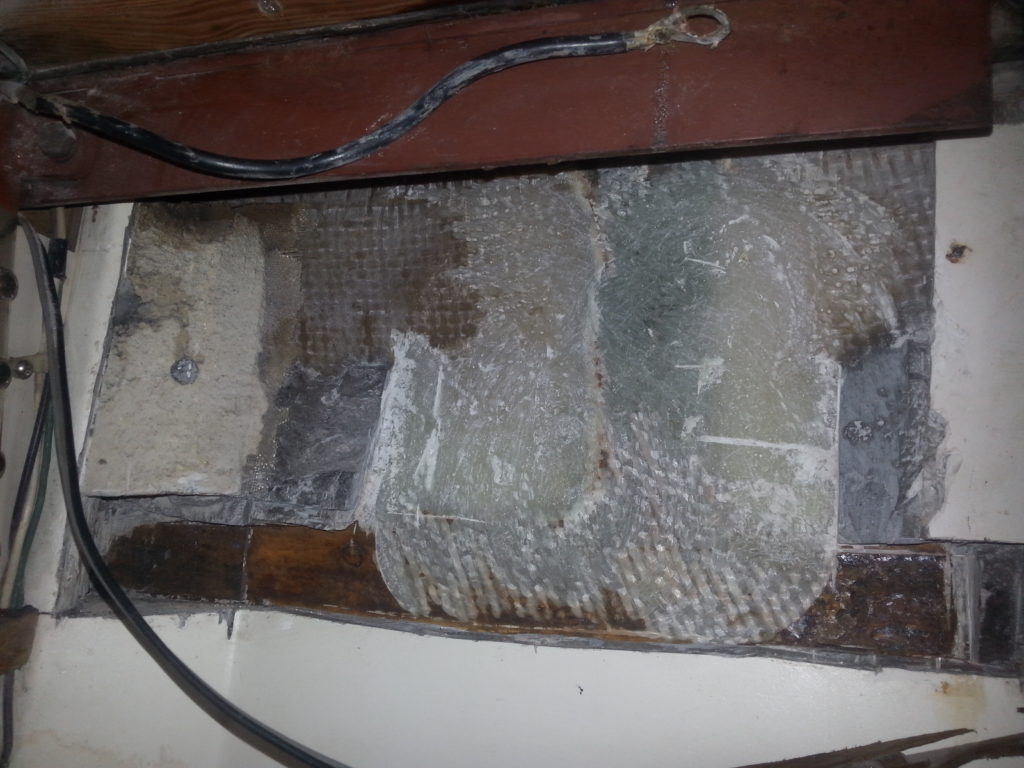
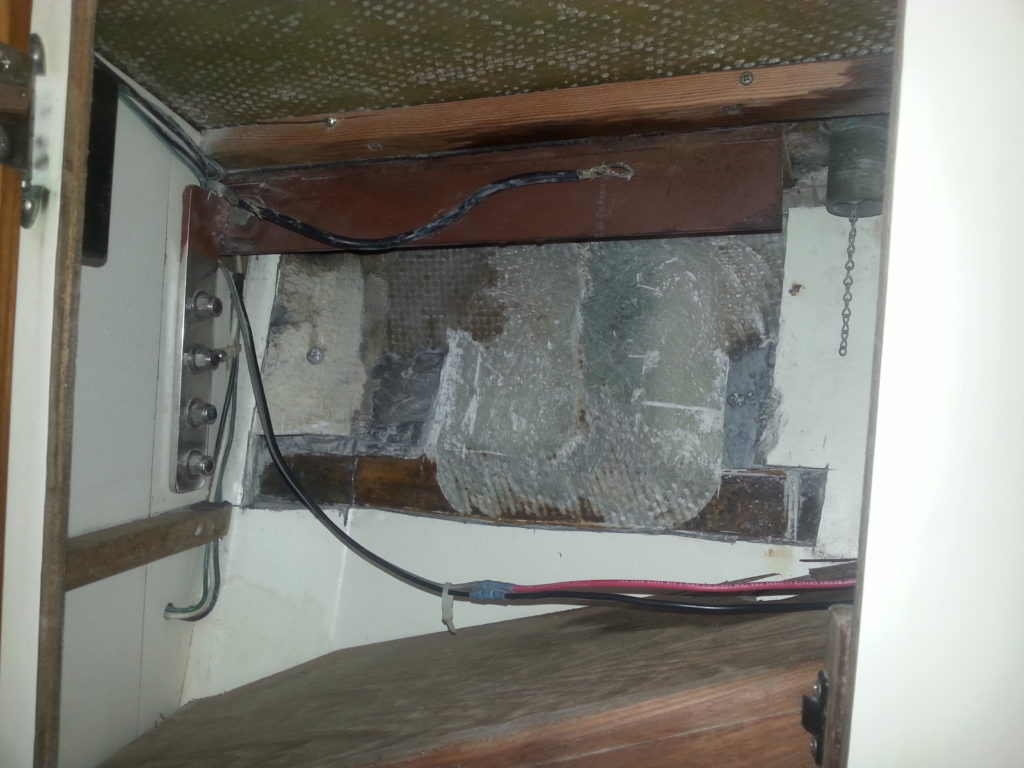
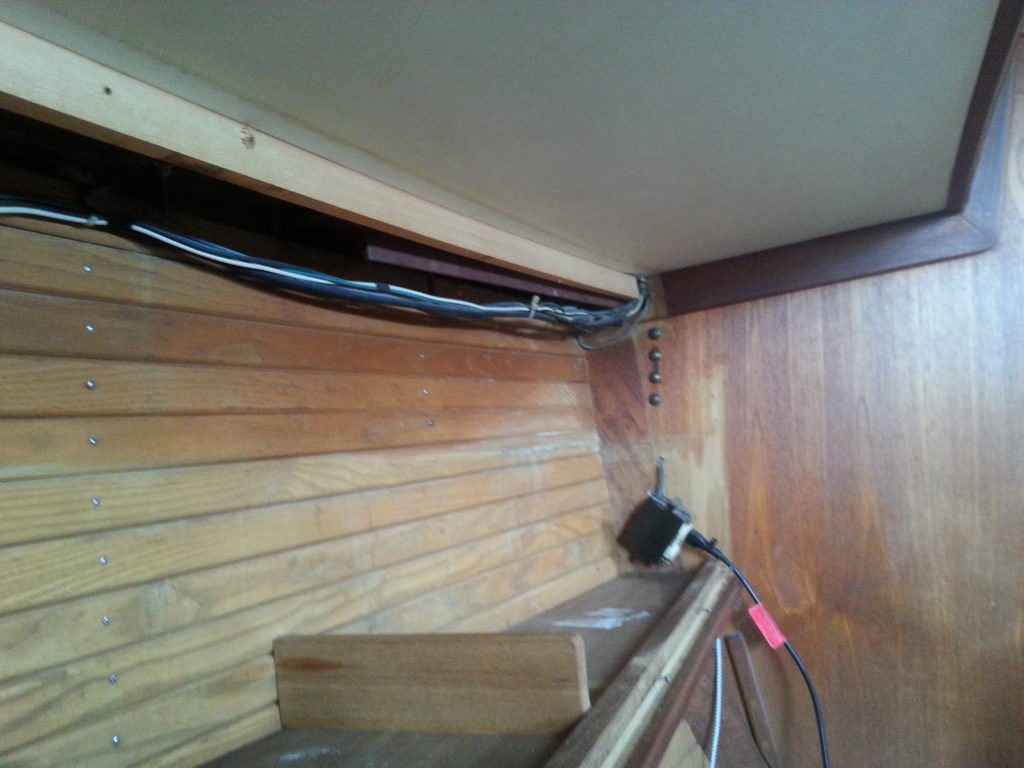
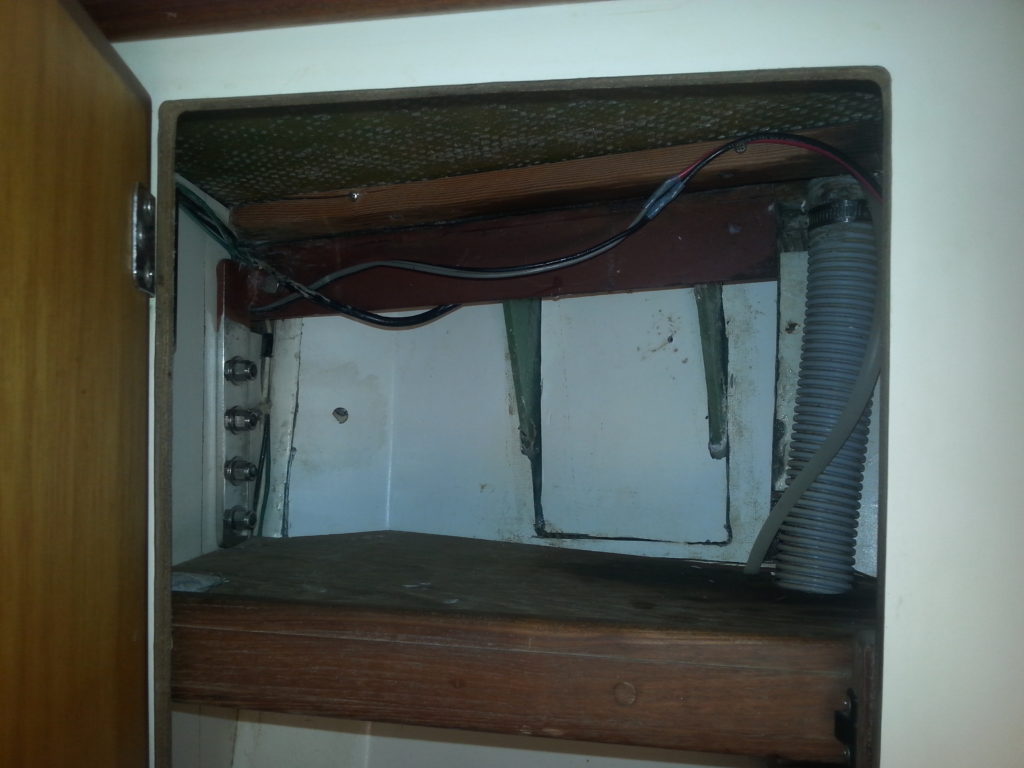
Trim behind settee removed 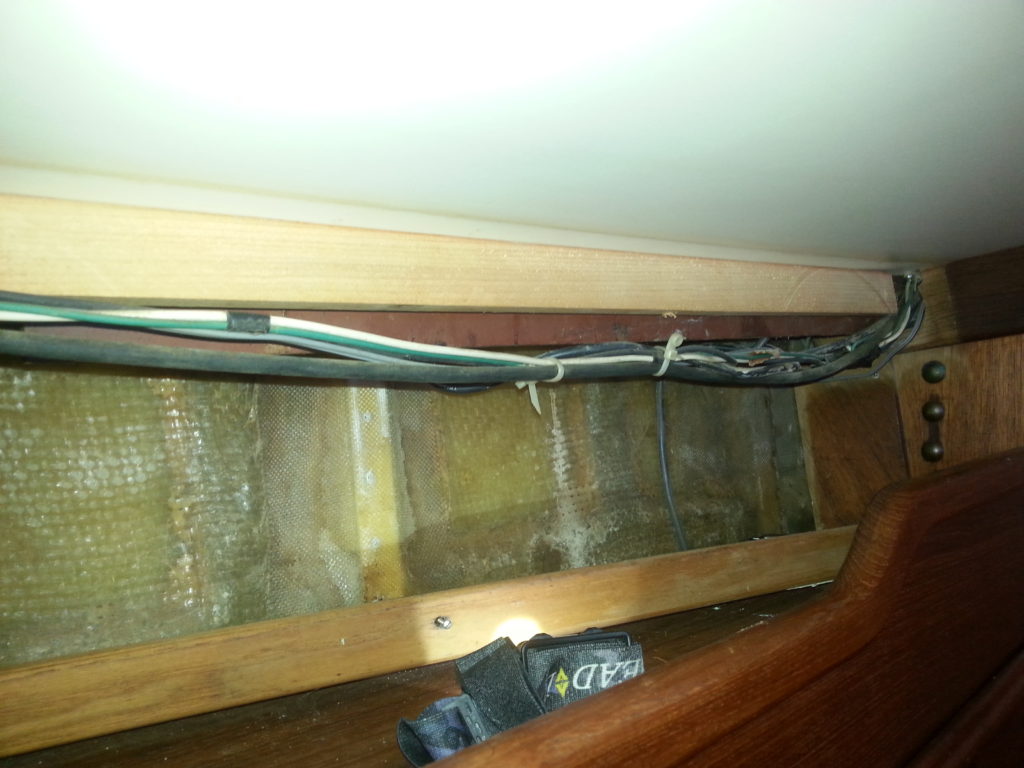
The blackish verticals are glassed-in steel; the whitish verticals are cleats to support the ash ceiling strips 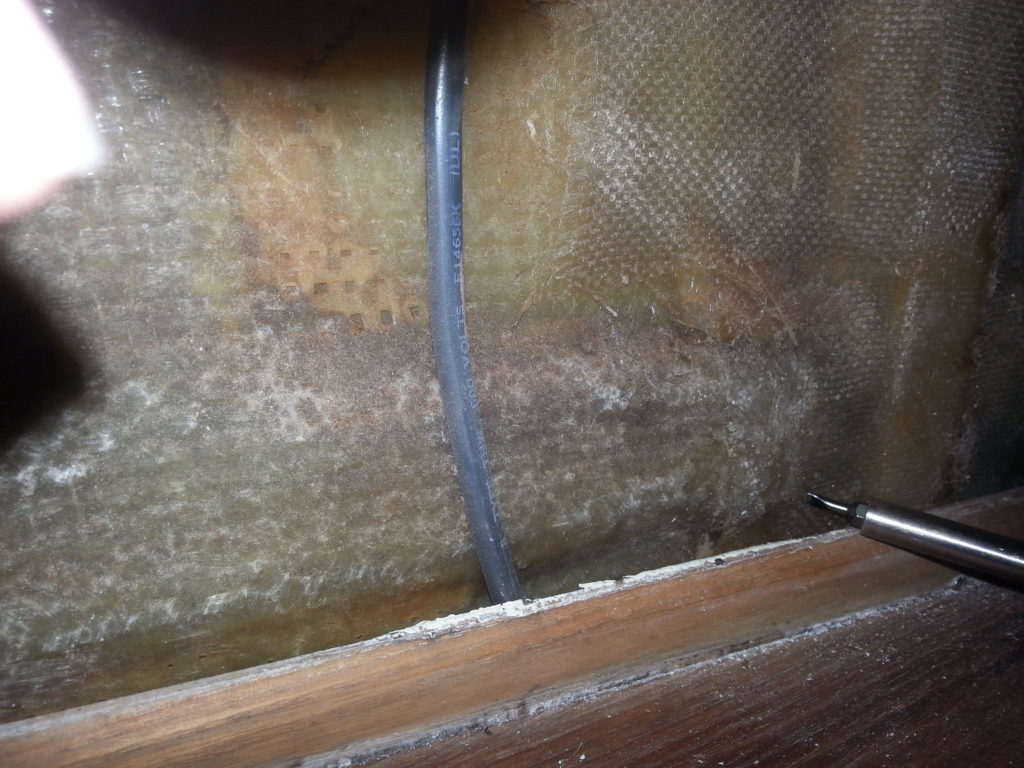
A close up of the weldment
Some possible solutions
Several Cape Dory owners have converted to traditional external chainplates. While that sounds like a simple solution, the difficult job of removing the rusting steel remains. The upper steel backing plate, which is not embedded in fiberglass, appears to be in good condition. If this could be left in place it would simplify things. Since it passes through the main bulkhead, inserting a new one would be problematic. I asked some expert welders about welding new verticals to it in place but was told that was not possible due to risk of fire.
The first big inspiration came from our friend David on Valkyrie while discussing the problem on the beach in Los Muertos. David suggested that knees with gussets could be constructed and bolted under the steel backing plate using the existing bolts from the pad-eyes. Brilliant – the backing plate can be left in place, no welding in the boat is needed, and the knees can be made out of material other than mild steel, such as stainless, aluminum, or here’s a thought, G-10.
Since we had never worked with G-10 we went to google for some advice. Strangely, the majority of the search results for working with G-10 explain how to make knife handles, not structural applications. When we were last in San Diego we met Dick of Evening Star who is in the process of converting his boat to electric power. His explanations of the engineering involved were fascinating, but what came to mind at this time was his use of G-10 for motor and battery mounts.
What I expected from Dick was some general advice on designing with G-10 and maybe some pointers to some references. It turns out Dick is not like that, he likes to get involved with the design. While he claims he is no expert on G-10, he did, after a series of emails, send some fabulous drawings of his ideas and suggestions.
Planning and prepping
OK, so now we have a vague but developing idea of how to proceed. Still, the idea of grinding all that fiberglass, and the nasty dust it creates did not appeal much. While in Mazatlan we asked for quotes from a couple of the marine shops to tackle the project. While they were very friendly, we could see that this was a project with which they were not familiar. We never did receive an actual quote from any of the places we contacted.
It was John of Carmanah who helped mitigate the fiberglass dust problem. He suggested using an oscillating multi-tool instead of a grinder. This would allow more cutting with thinner cuts, thus more of the glass could be removed in big chunks. These tools were invented by Fein originally for the medical profession to remove plaster casts without cutting the patient. The patent expired in 2009, and the market has been flooded with copycat tools. Seems like a good excuse to acquire one.
On our trip back to the states in January we bought a multi-tool, along with a box of 50 saw blades from Amazon. We were fortunate to find an industrial plastics shop which sold G-10 from their scrap bin. We were able to cut some pieces using a table saw, hoping that they would be the right size. We usually prefer more detailed planning, and measuring in place, but when the tools are here and the boat is there, you do what you gotta do.
We also ordered replacement bolts for the pad-eyes. Unfortunately we were not certain what size to get. Research on the Cape Cory message board indicated that they should be either 3″ or 3 1/2″ long, and that Cape Dory often used bolts that were longer than necessary. Since our bolts had a good 3/4″ exposed beyond the nut, we figured 3″ would work. This turned out to be a mistake, as we had neglected to consider that we would be adding 1/4″ of G-10 to the thickness. As a result, the 3″ bolts were just long enough that the nylock portion of the nut did not quite make the thread. Sometimes you just guess wrong.
The work begins – phase 1
After some consideration, we felt Mazatlan was the best place to take on this project. There are plenty of yacht services that could help if we ran into trouble, we could have a possibility of having parts shipped from the -tates, and if worse came to worse, we could leave the boat there all summer. It also meant that we could enjoy the prime winter cruising season in Banderas Bay and Barra de Navidad. We left Barra in late March intending to head quickly to Mazatlan, but ended up spending several days in La Cruz due to engine overheating problems. (More on that in a future post).
The forward lower shroud which terminates inside the cabinet in the head seemed like the place to start. We emptied all our stuff out of the head compartment and lockers, closed the door, sealed the cracks, and started making dust. The first order of business was to remove a part of the hull liner. The cast cutting tool came in handy here, cutting through the first layer without cutting the second, especially when you really don’t know how deep to go.
Liner removed and part of the cancer exposed 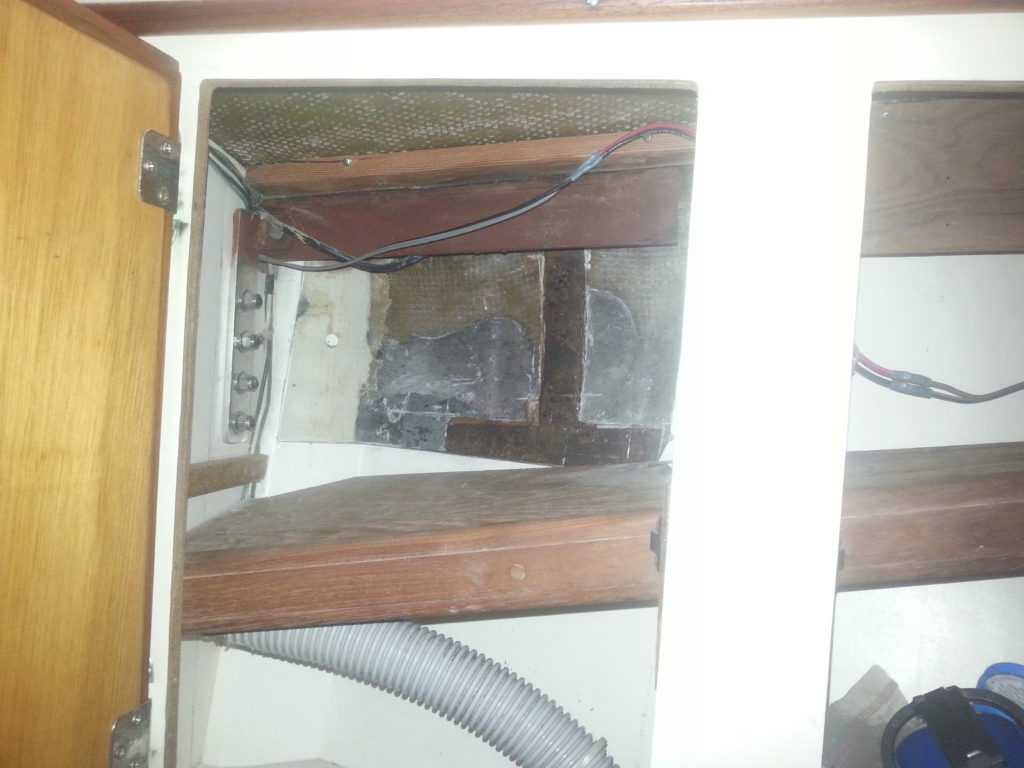
Working through the locker door was like keyhole surgery 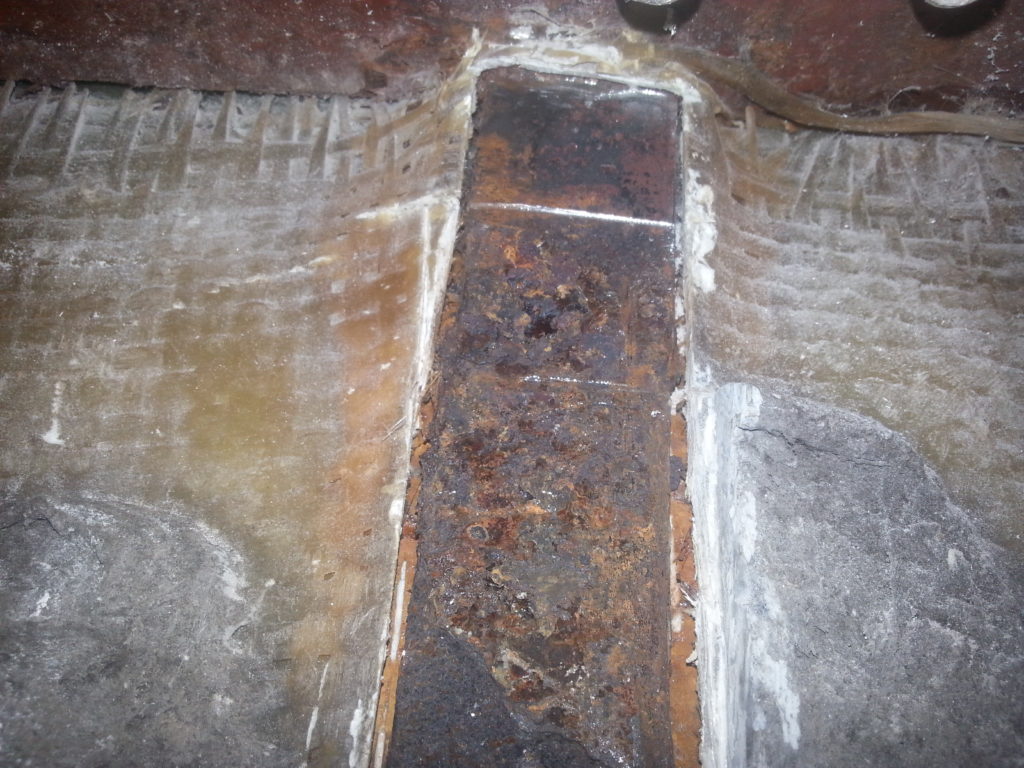
It’s a bit rusty 
More rust
More hot and sweaty work and some cutting with the grinder and the forward part of the tumor was extracted.

This was the inside, away from the hull 
The side against the hull was more rusty 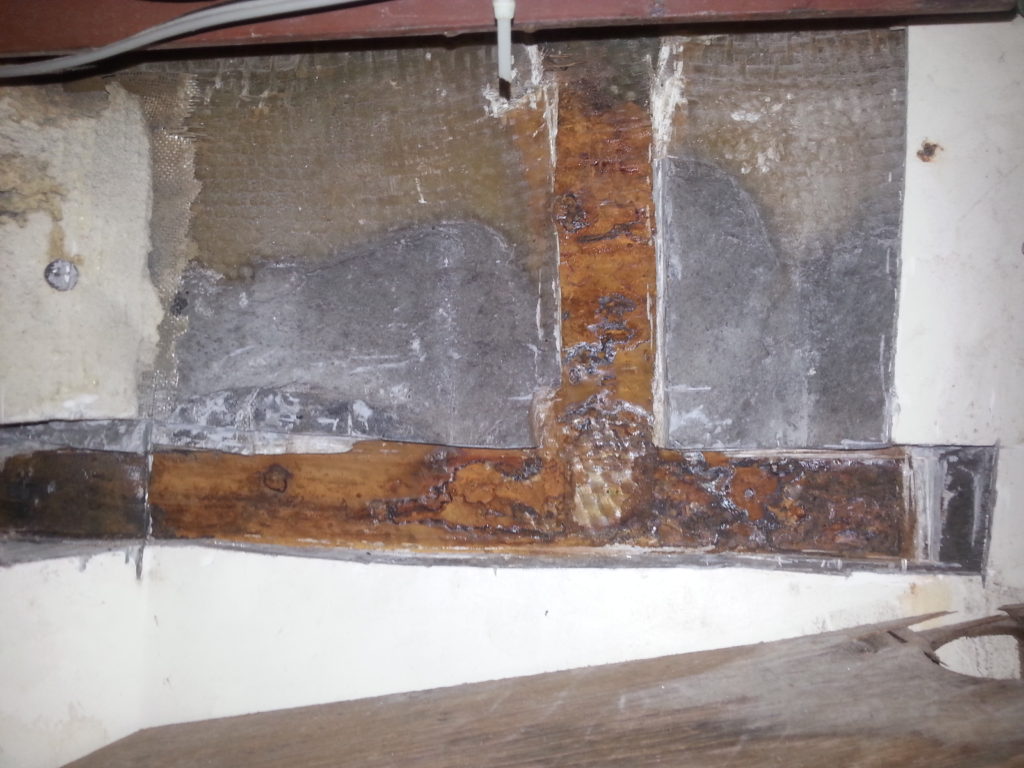
Bad stuff gone 
What’s left 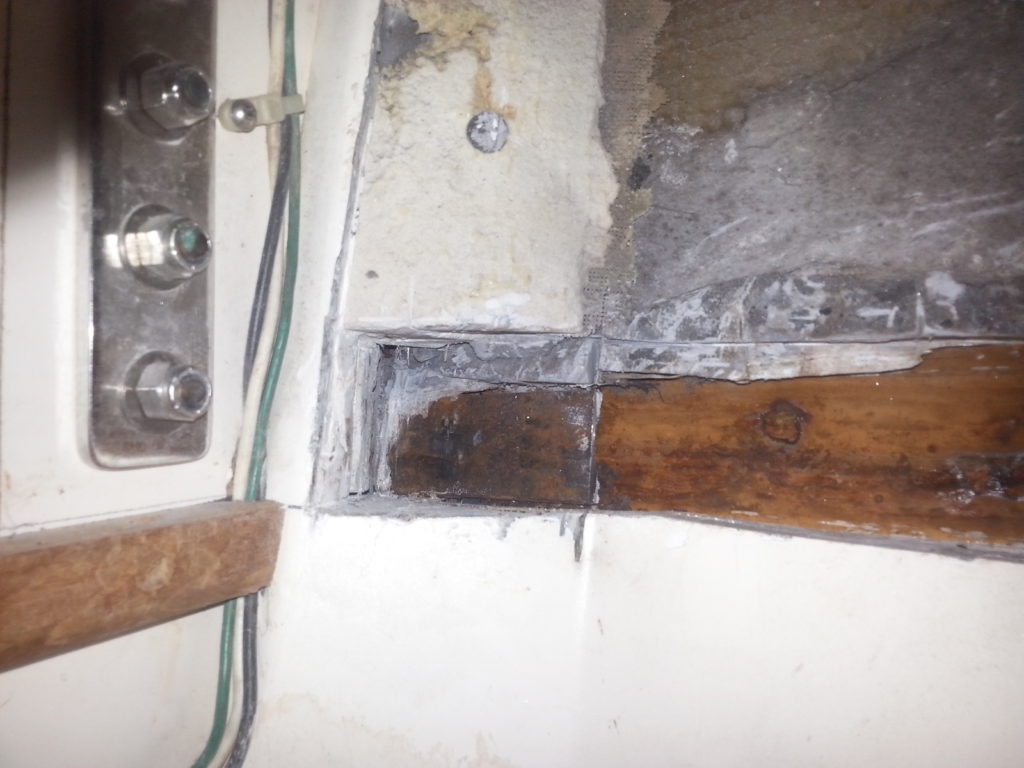
Not sure how to remove the piece spanning the bulkhead
The next task was to clean the hull surface to receive the glassed-in G-10 gussets. This involved removing some of the fiberglass that was encasing the steel and removal of the rusty surfaces so the new epoxy will bond well. We mostly used the grinder for this, which generated the dreaded cloud of dust.
After a thorough clean up, it was time to install the knees. We decided that assembling and glassing in place would give the best fit. Step one was to drill the bolt holes for the top piece and bolt it in place. The vertical gussets were held in place for glassing using jigs made from the old plywood dingy floor we had replaced earlier. The procedure was to apply thickened epoxy to the gusset, prop it in place with the plywood jig, make fillets on the joints using more thickened epoxy, then apply three layers of glass cloth to bond the gussets to the upper piece and the hull. This was done all at once for each gusset so the epoxy would get a chemical bond to itself and sanding would not be required.
Everything covered in plastic, ready for glassing 
Plywood jigs hold things in place while the epoxy sets 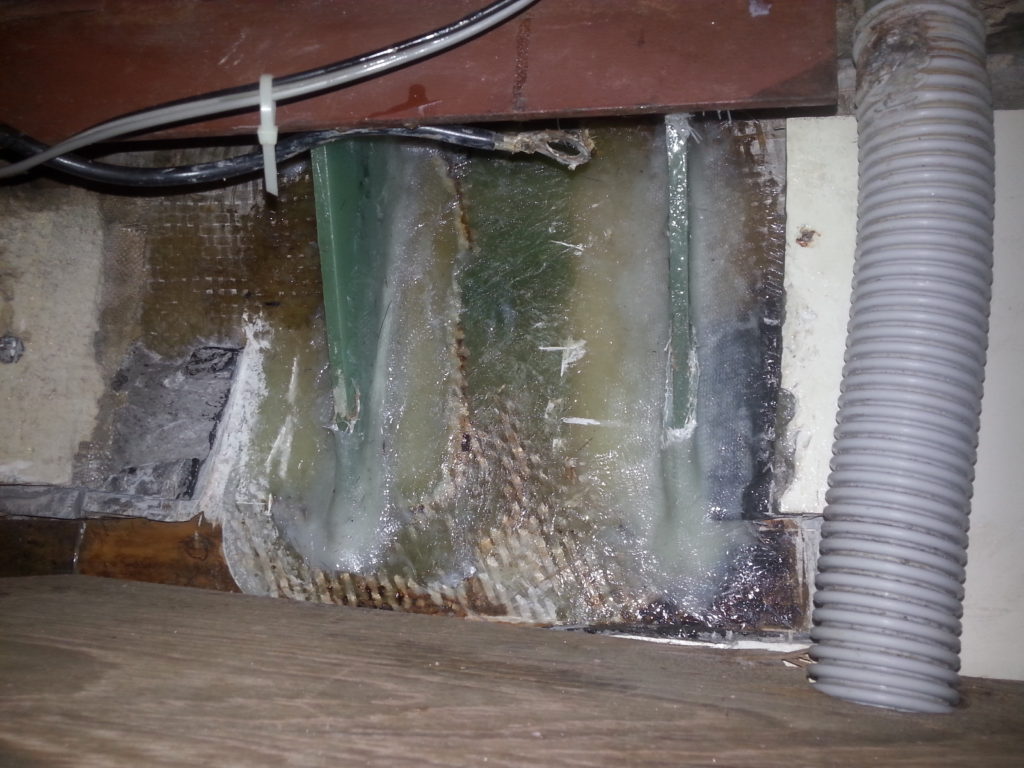
The finished knee
Phase 2 – in the main salon
Now it was time to move the shop into the main cabin to complete the two remaining chainplates. Obviously first we would have to empty the lockers on the port side and find a place for everything while continuing to have space to live aboard. We would spend the next week or so living like hoarders – stuff was piled everywhere.
Next was to investigate how to remove the cabinetry that was blocking access to the weldment. We could take a minimalist approach and only cut away in places that would not be visible when reassembled, but that would require working through small spaces. Or, we could expose the whole thing, and worry about visible damage after reassembly. We had read on the Cape Dory forum that the manufacturer typically did not use glue in the cabinetry. We did find, however, that they had countersunk and plugged all the screws, even those only visible inside the lockers. So we set about removing selected plugs and screws to see what would come out.
We found the wood was not glued together, but it was precision cut to a tight fit. We were able to remove most of the cabinetry while only removing a handful of wood plugs that are visible from the main saloon. Now we not only had the locker contents, but also pieces of the lockers scattered about the cabin. We left the lower shelf in place as it made a good tool shelf while working. We taped up sheets of black plastic to contain the dust, which would make the work area stuffy and dark. We suddenly remembered we had a roll of LED tape lights buried in a locker. Now the work area would just be hot and stuffy. Tony christened it the cocoon, but Diane called it the man cave. What does she know, man caves always have a TV and a bar.
Cabinetry removed 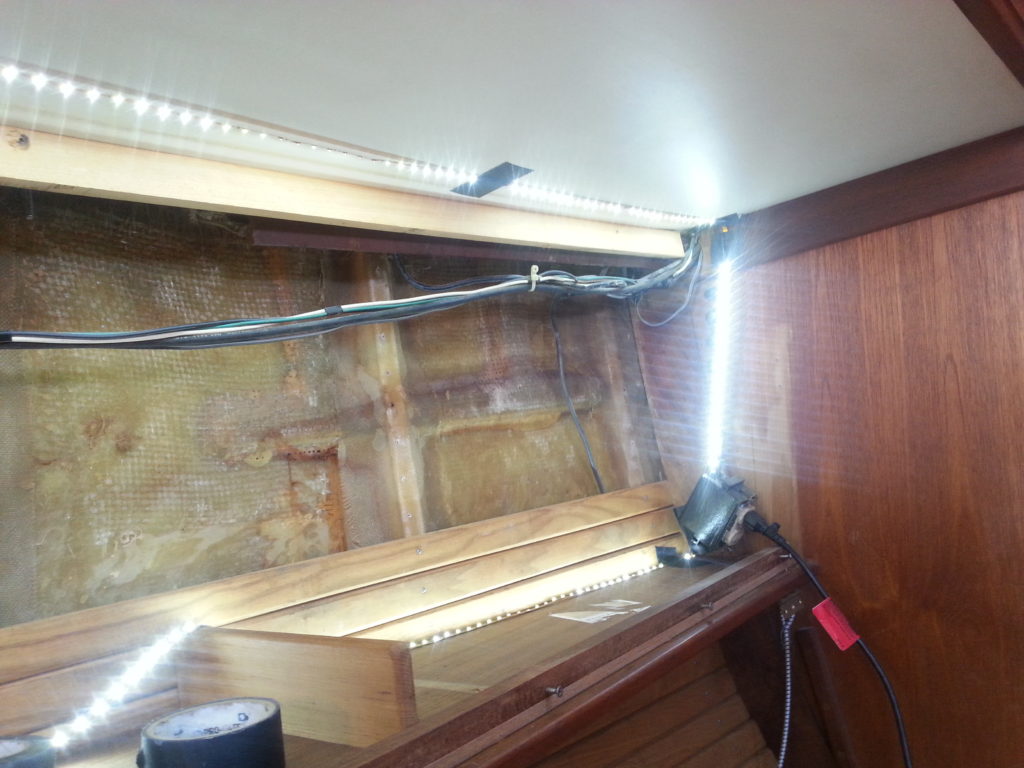
The LED light strip really made the workspace tolerable 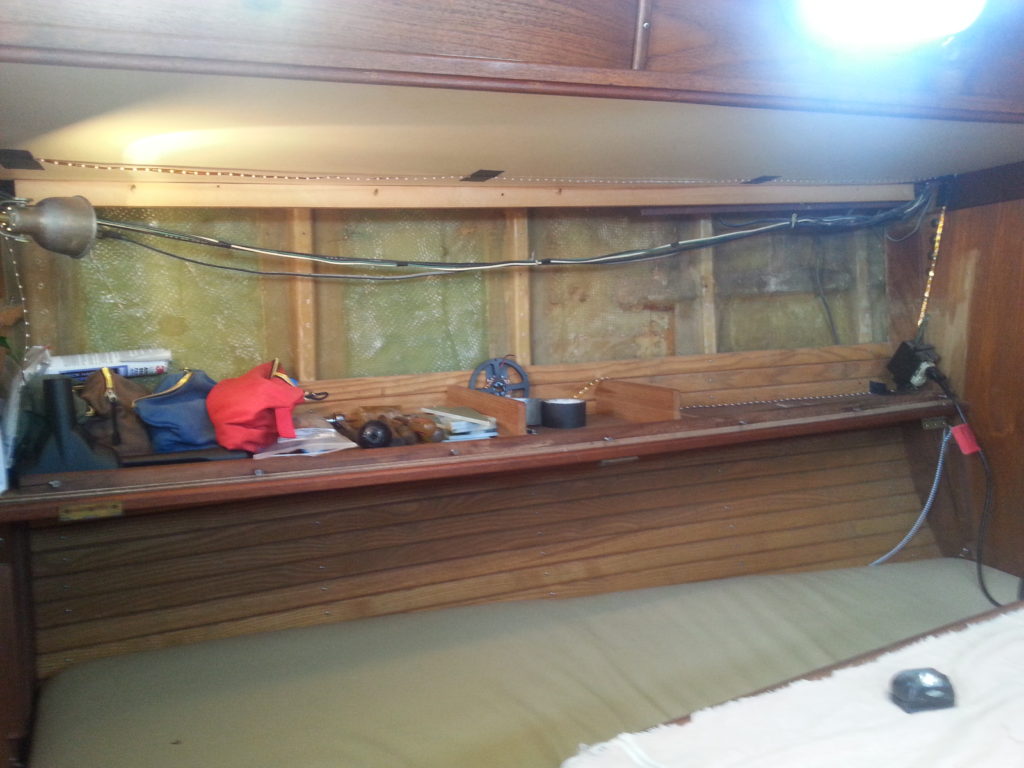
Handy tool shelf 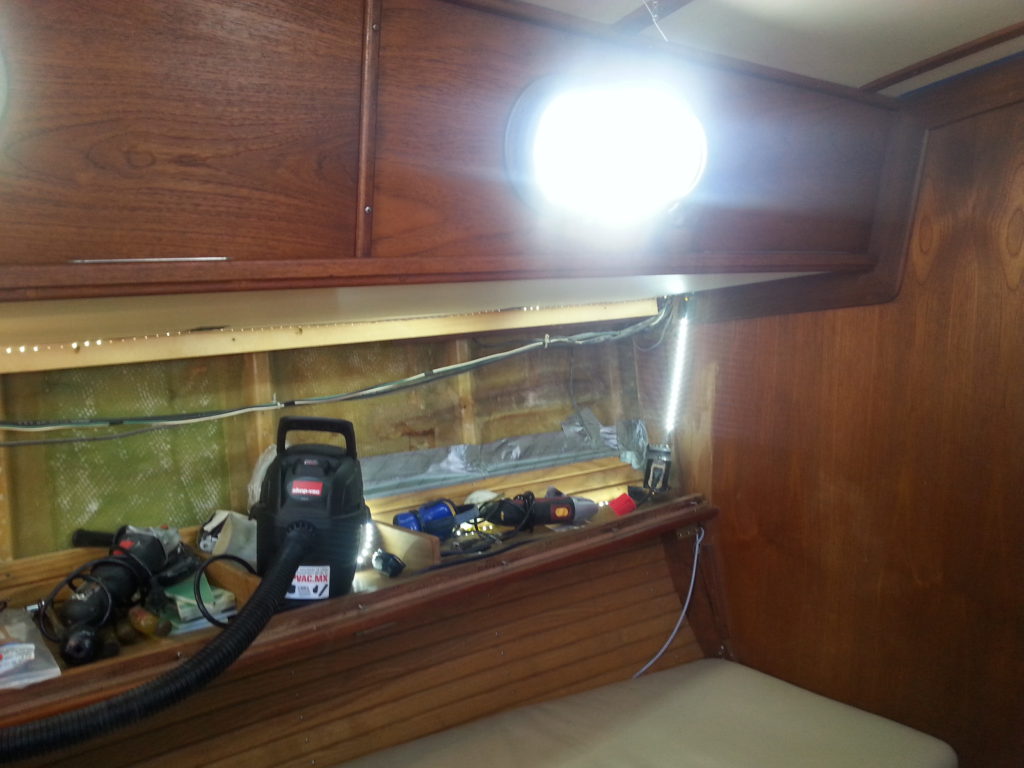
Tools tend to pile up 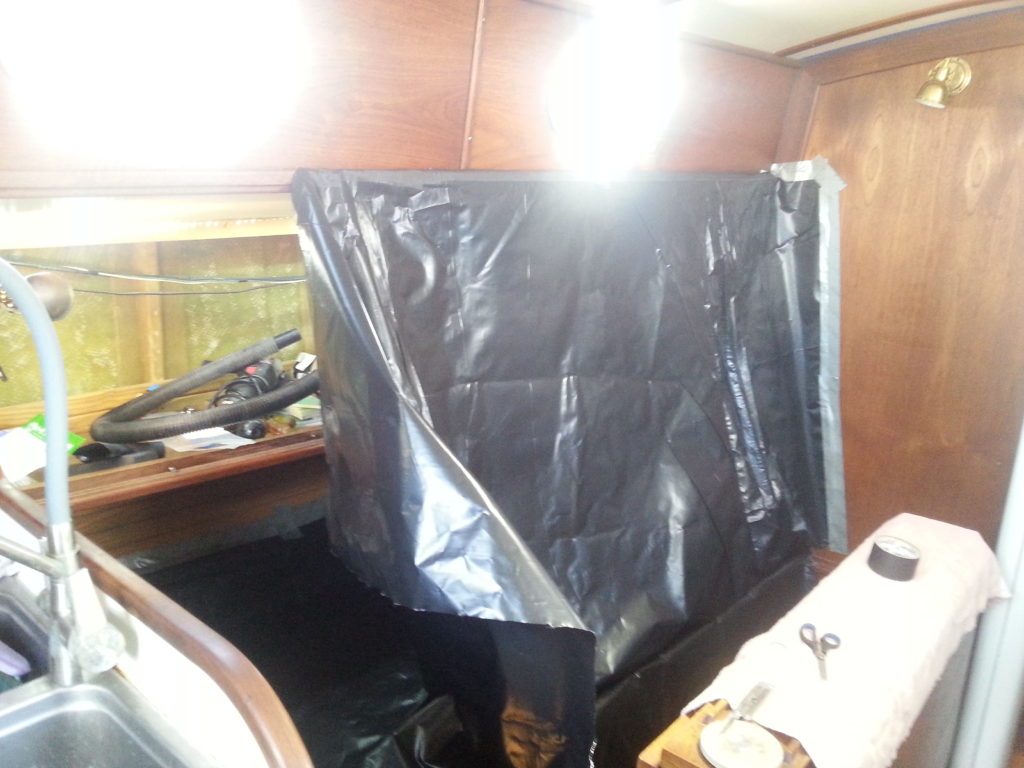
The cocoon/man cave 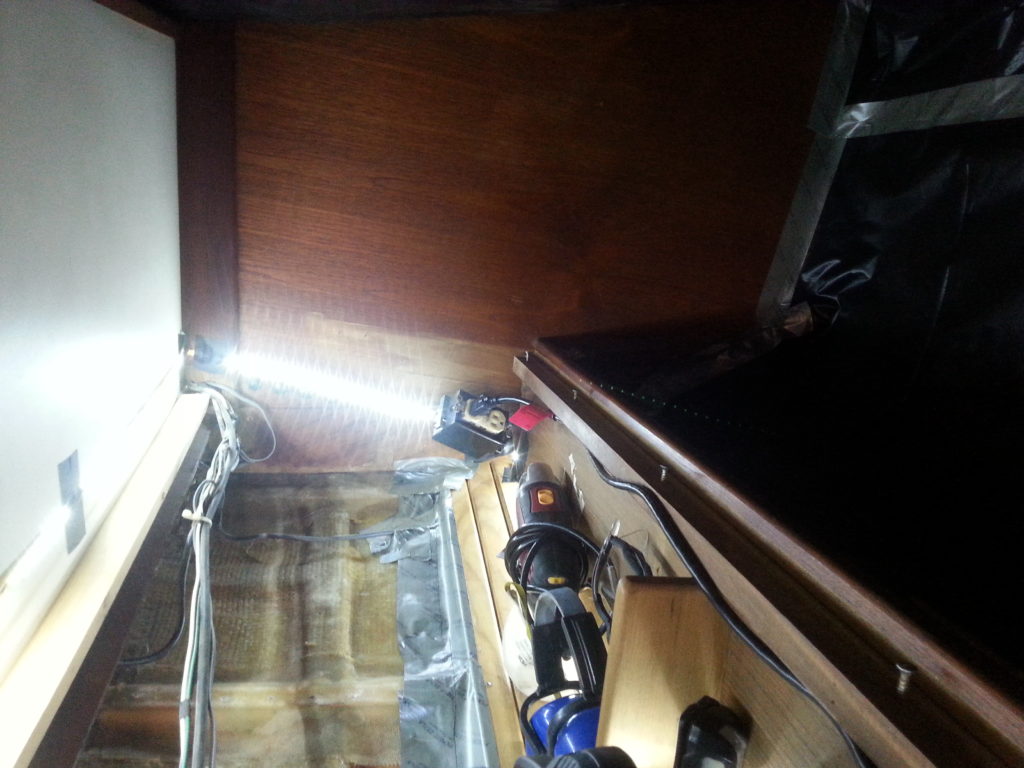
Inside the cocoon
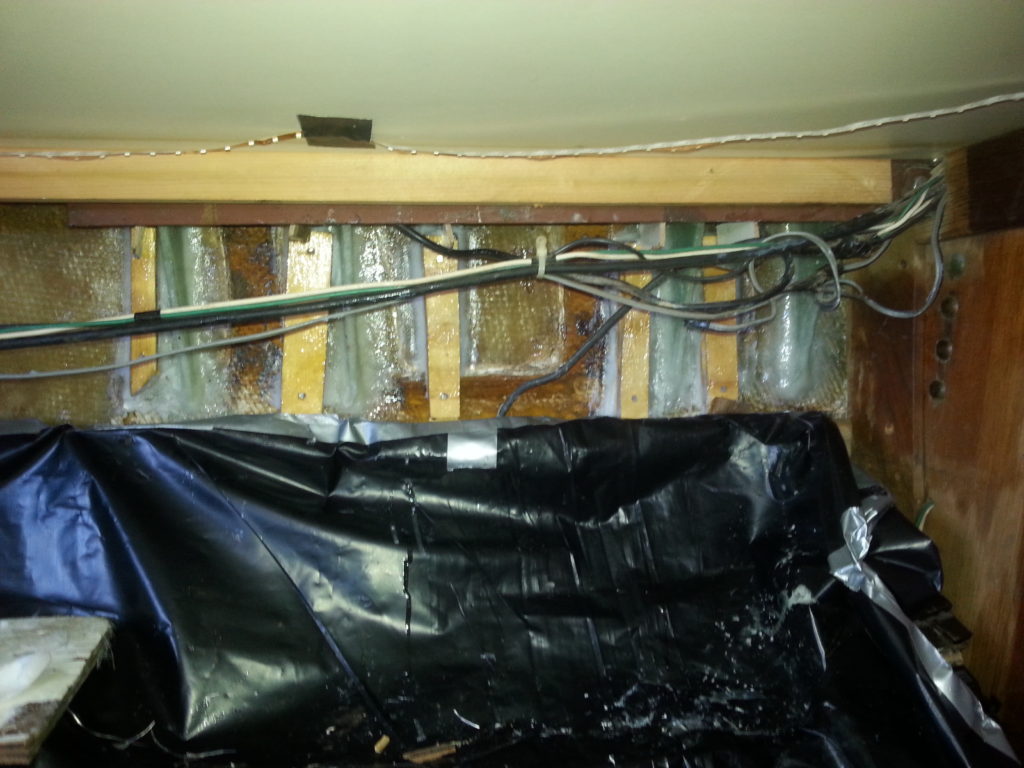
Time to get serious and remove the rest of the tumor. The oscillating multi-tool really got a workout here. The steel was cut where needed using the grinder with a cutoff disk. Except, that is, for the one piece of vertical steel that was just aft of the main bulkhead. It was slow, but the multi-tool was able to cut through that 1/4″ piece of steel. It was the only tool we could think of to get up in that corner, and we don’t know how we could have removed that piece without it.
The toumor, compleet 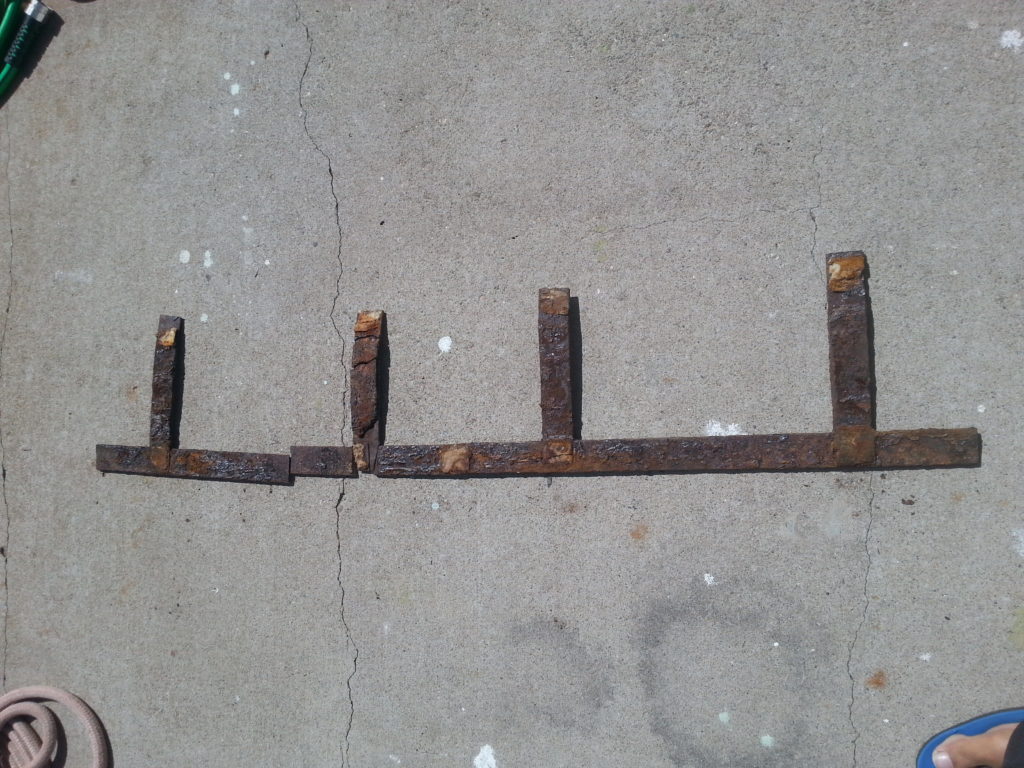
Back side of the tumor 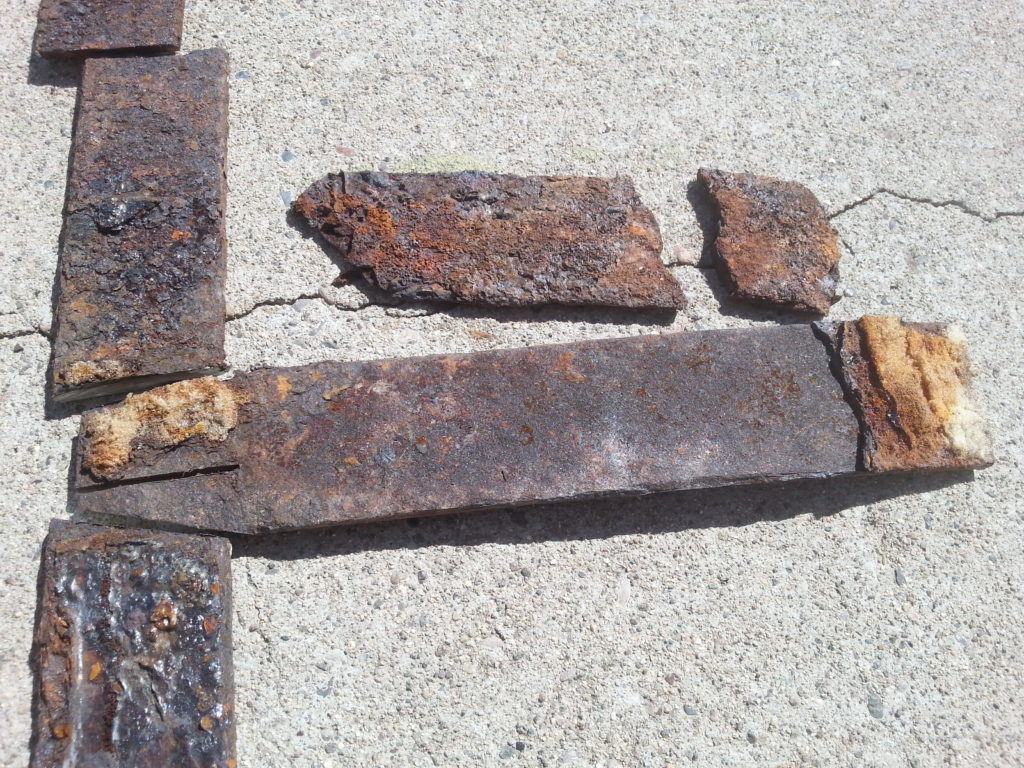
From the rustiest part 
One of the ceiling strip cleats 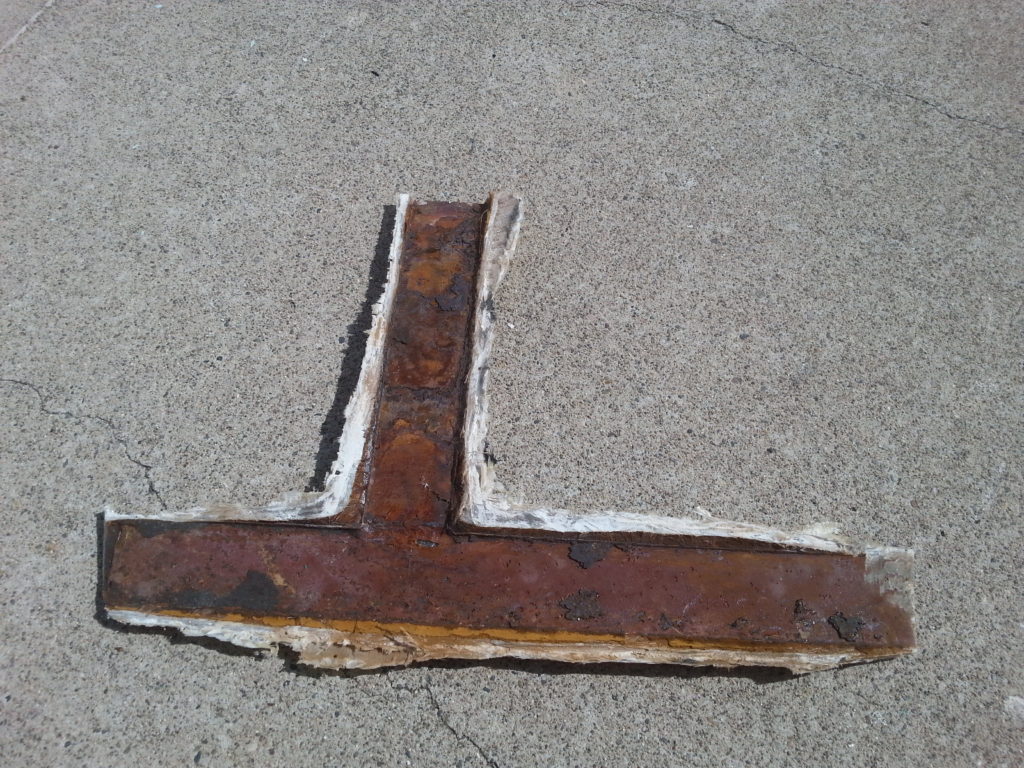
Piece of glass that embedded the steel 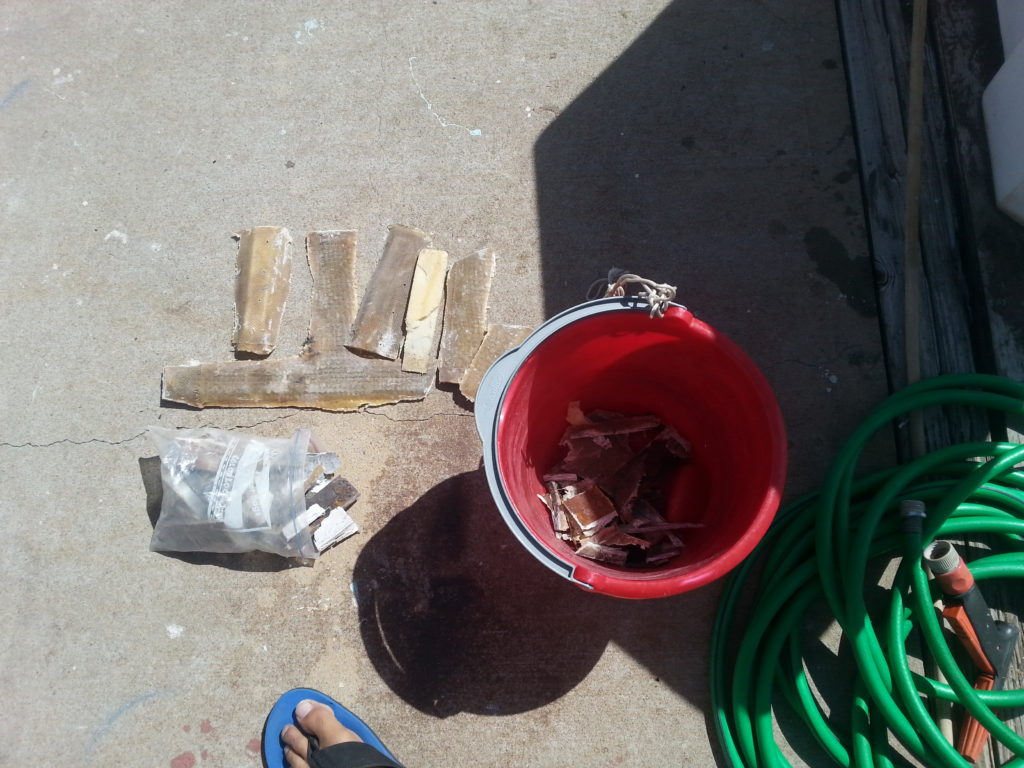
If not for the multi-tool, all this would have been itchy dust
This time we only removed enough of the extra glass to make space for the new gussets. We cut away the chunks with the multi-tool, and also used it with an abrasive head, instead of the grinder, to flatten and abrade the surfaces to receive the new glass. It was slower than the grinder, but created much less dust. We spent much of the time both cutting and abrading, working like a dentist, multi-tool in one hand and vacuum in the other.
Close up of the aft end of the steel backing plate 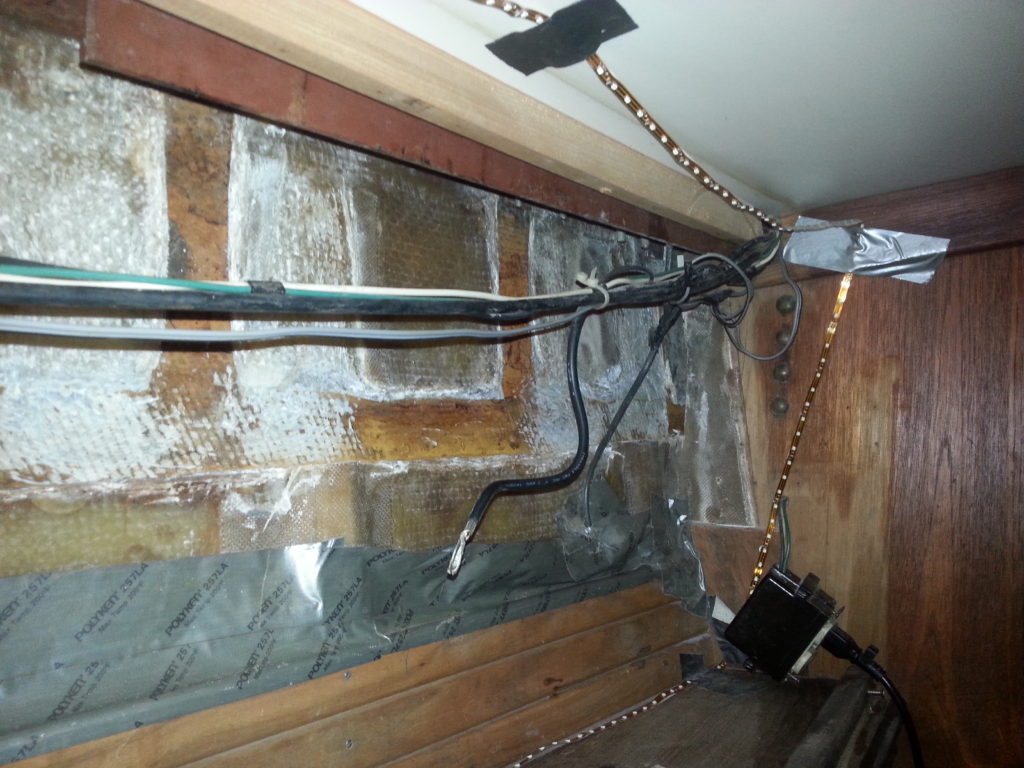
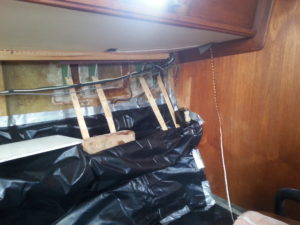
Prepped for glassing 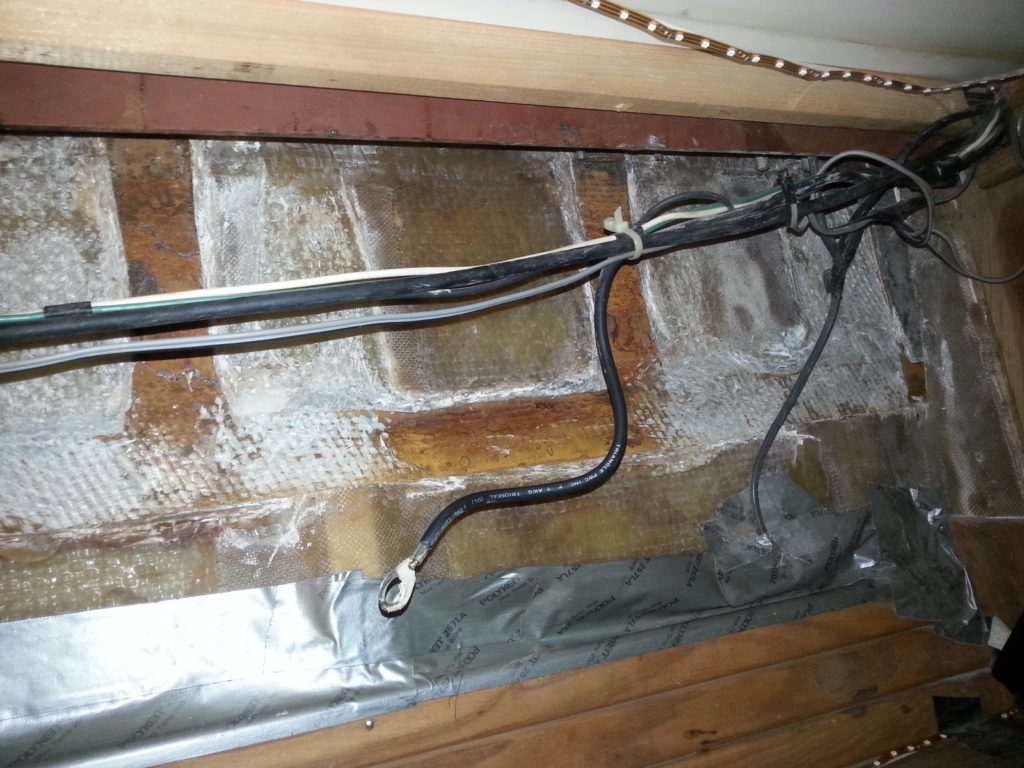
Those wires were always in the way 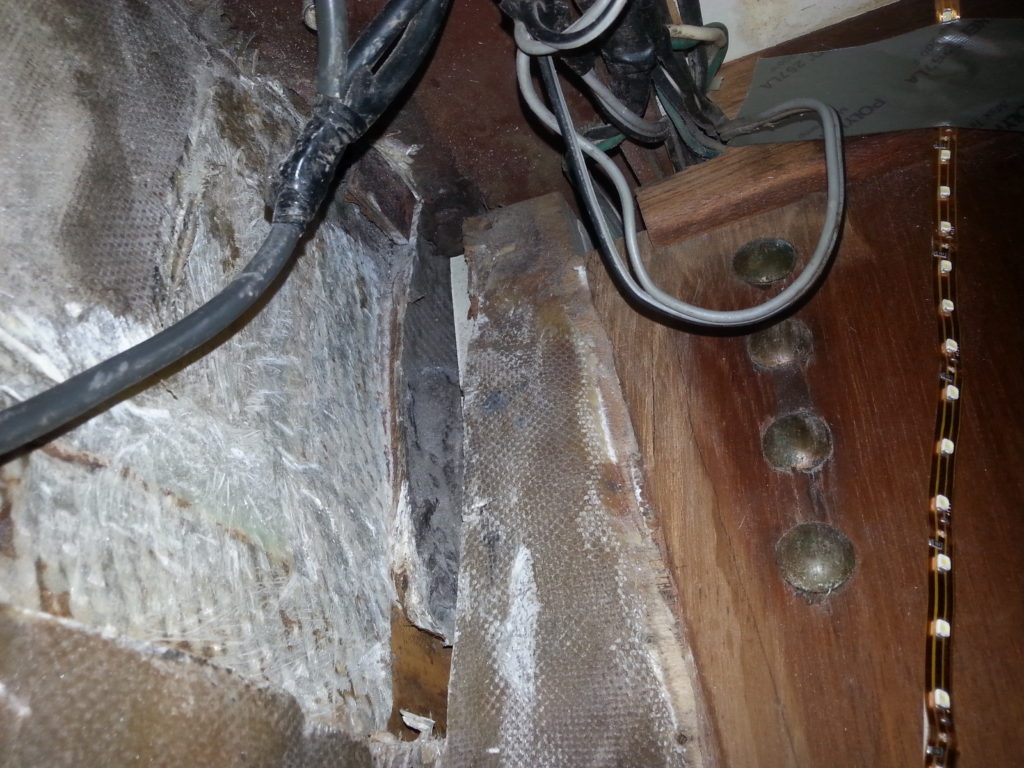
Up near the main bulkhead
A problem
Next on the list was to drill the upper G-10 pieces and use the pad-eye bolts to hold them in place for glassing the gussets. The too-short bolts that I mistakenly bought came in handy here as I did not have to repeatedly screw and unscrew over the nylocks. As we were working on the aft lower shroud we noticed that the holes drilled through the deck do not appear to be perpendicular to the backing plate. We did not notice this before initially removing them, but then again we weren’t looking for that.
We had a chat with our friend Sonny, a retired airline mechanic. He of course suggested wedge washers, but where would we get them, or how could we make them? The solution was remarkably simple. We could make them out of the scrap G-10. To avoid trying to grind small pieces, we could make one piece to go between the two bolts. Vice grips and a dock box make a serviceable bench vice, by the way. We think the result came out quite nice.
Poor alignment 
The “bench vice-grip” 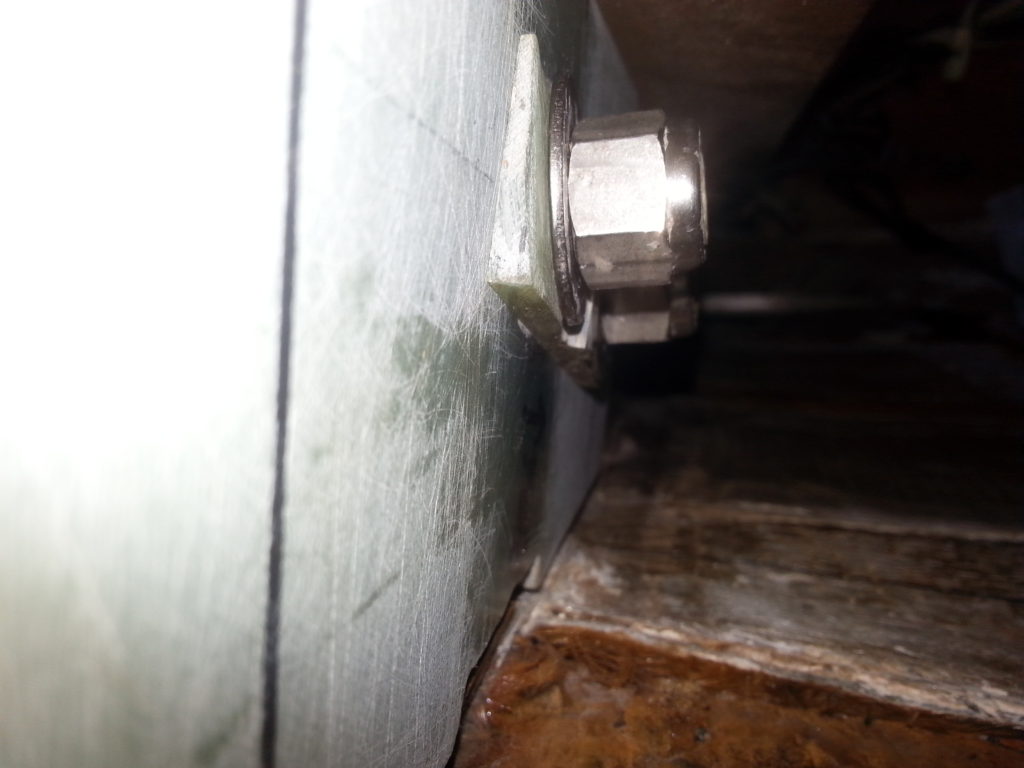
Wedge washers 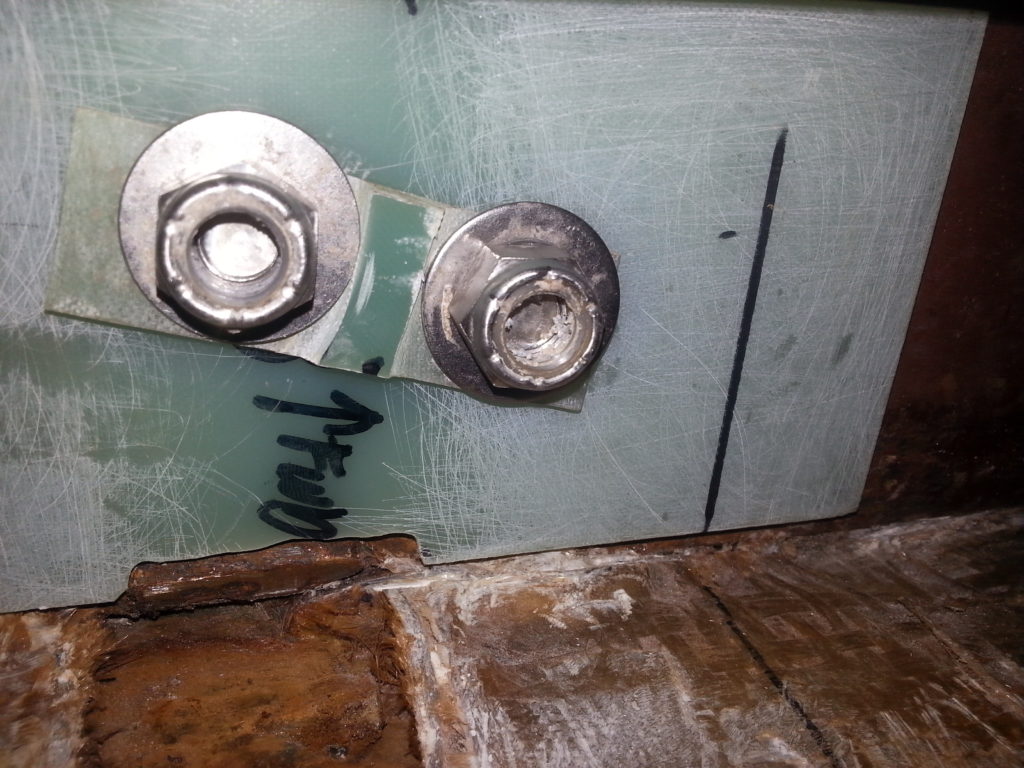
Problem solved
More glassing
The G-10 knees were glassed to the hull in a similar manner as we had done for the forward lower. Once again pieces of the old dingy floor became jigs to hold the gussets in place. More important, we were able to take down the cocoon, using the plastic to protect the remaining cabinet shelf.
When the epoxy had catalyzed we were able to re-bed the pad-eyes using 3M 4000uv. As previously mentioned, we had bought the wrong size bolts for replacement. We went looking for 3 1/2″ stainless bolts in Mazatlan but were told they were unavailable. We cleaned and inspected the original bolts and decided they were in good shape and would last another couple of years. Since we had a full tube of 4000uv, more than needed, we thought this would be a good time to re-bed that port light that has shown signs of slightly leaking. That was another job that took all day to clean and prepare. We didn’t take pictures, but the procedure was mostly as described by the owner of Far Reach.
Cosmetics
With the shrouds properly reattached, it was time to put the boat back together. Since we now had gussets where some of the ash ceiling strips had been, we needed a new plan. We used some of the left over plywood from the new dingy floor to make additional landing cleats to secure strips between the gussets. We then had to cut each strip to fit. This involved a lot of climbing on and off the boat, as no one wants sawdust in their living room, and we had already removed the cocoon. A good table saw would have been handy as well, but the multi-tool did just fine. It really is quite easy to control.
We decided we were OK with leaving the G-10 gussets partially exposed, mostly because it was the easy solution.. They are not that obnoxious once we store a bunch of stuff on the shelf. We could have covered each of them with fabric, burying the edge of the fabric behind the ceiling strips. We might have done that if we had matching pieces of upholstery, but we didn’t.
Cleats to secure ceiling strips 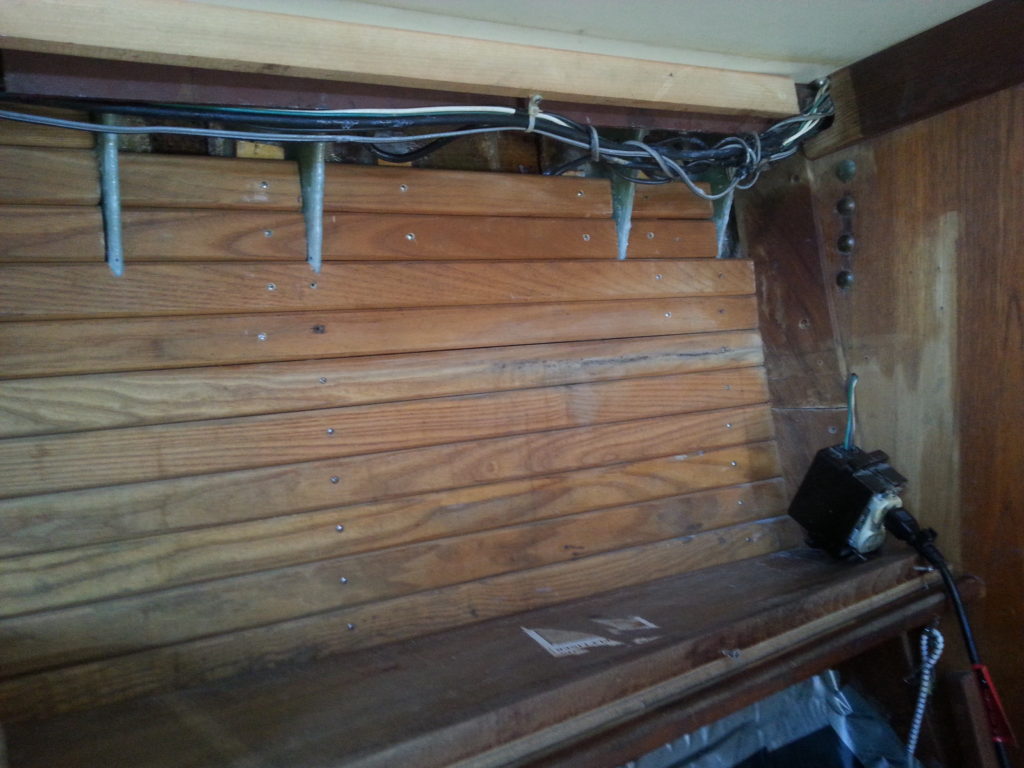
Each one custom fitted 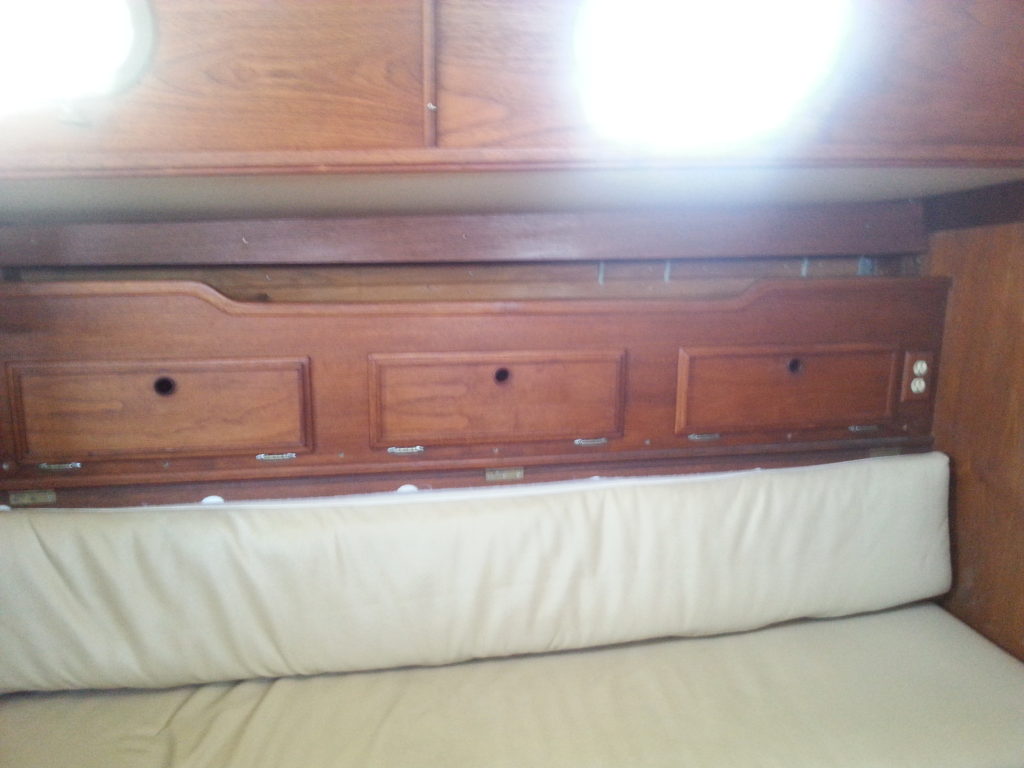
The boat is back together 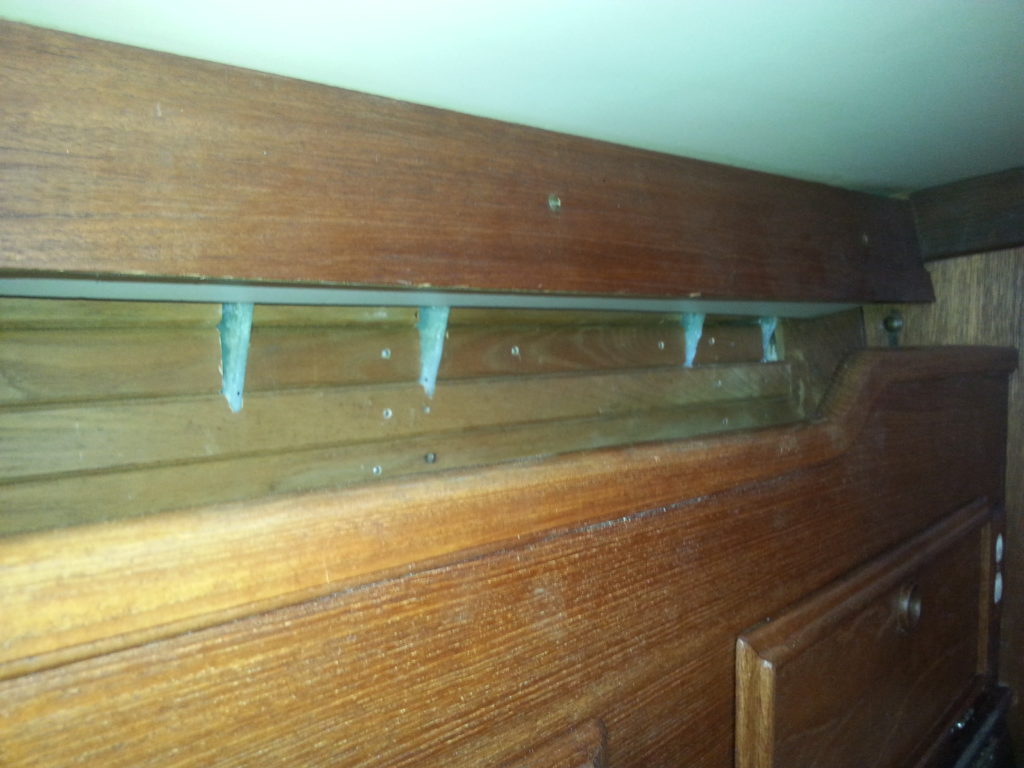
Doesn’t look too bad 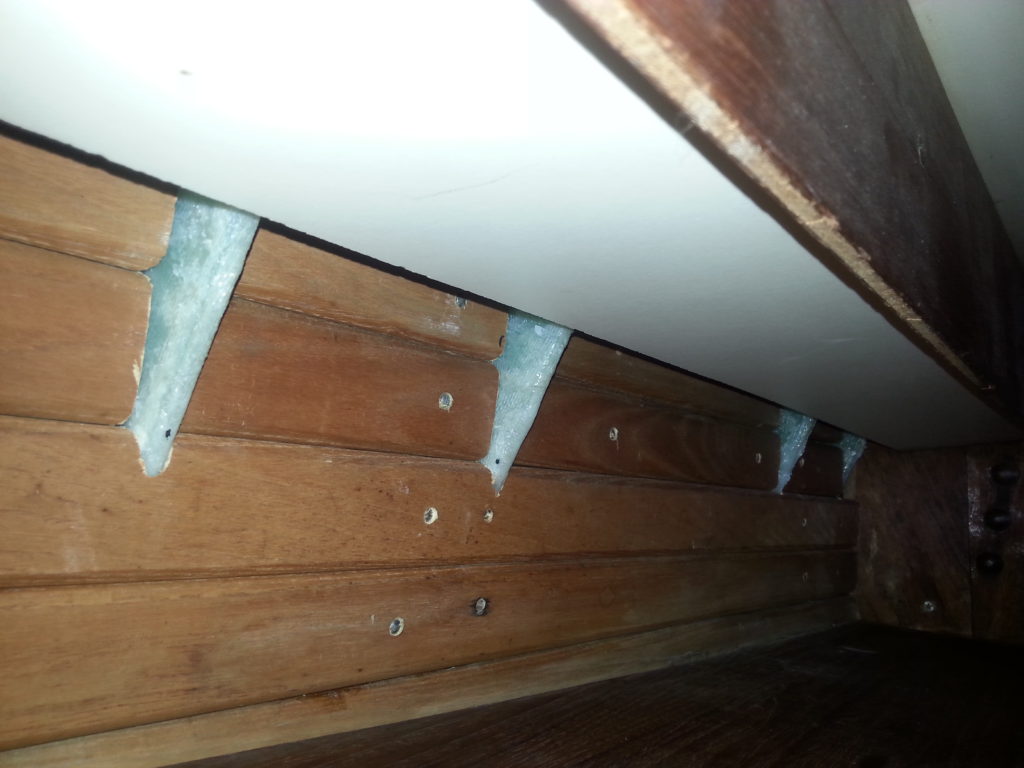
Only a little exposure 
We will come up with a way to mask this final little corner later
We had originally planned to cover the removed liner section in the head locker with 1/8″ plywood door skin. Of course, we would have to find a piece. We discovered that, totally unplanned on our part, the original exploratory cutout nearly matched the location of the gussets. With a little grinding and shaping, the original liner pieces were made to fit. We used some left over ash strips to secure them in place. I love it when a plan comes together, especially when we don’t have a plan.
Just put the old pieces back in 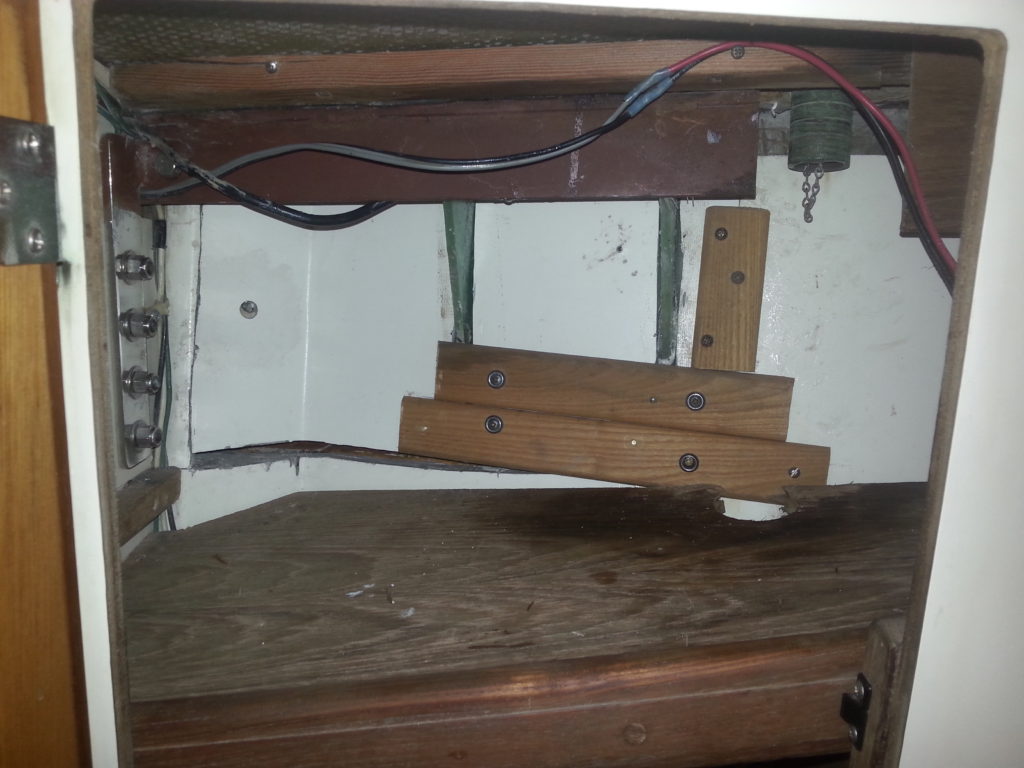
Secure them with a few scraps 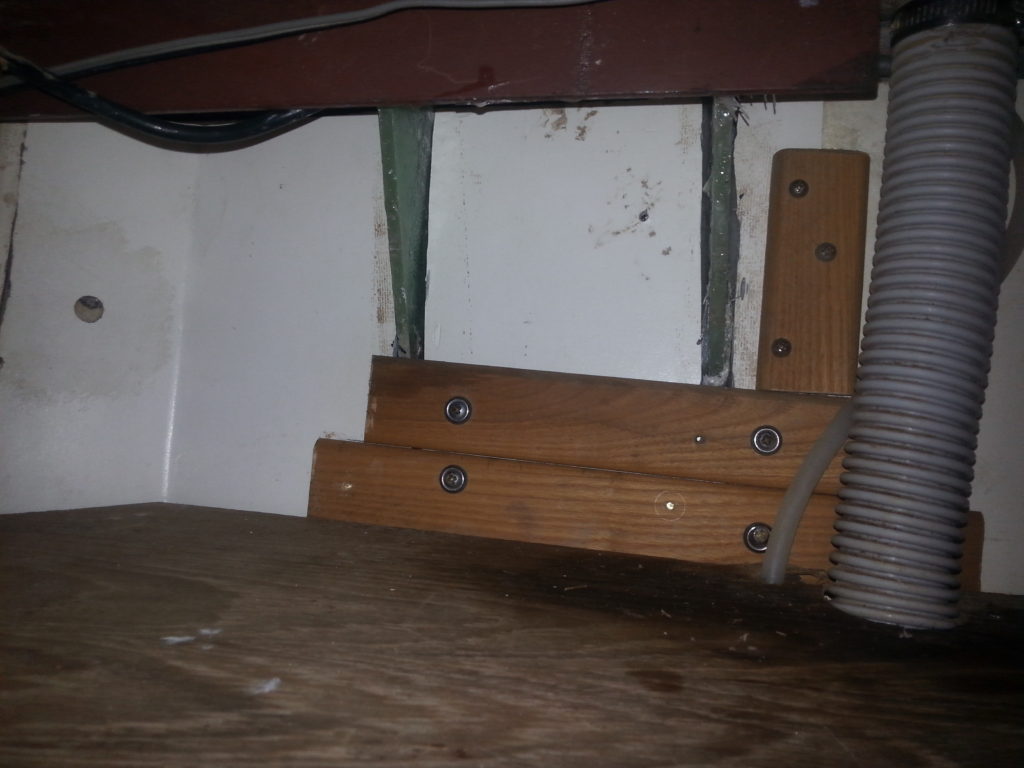
And put the shelf back in place 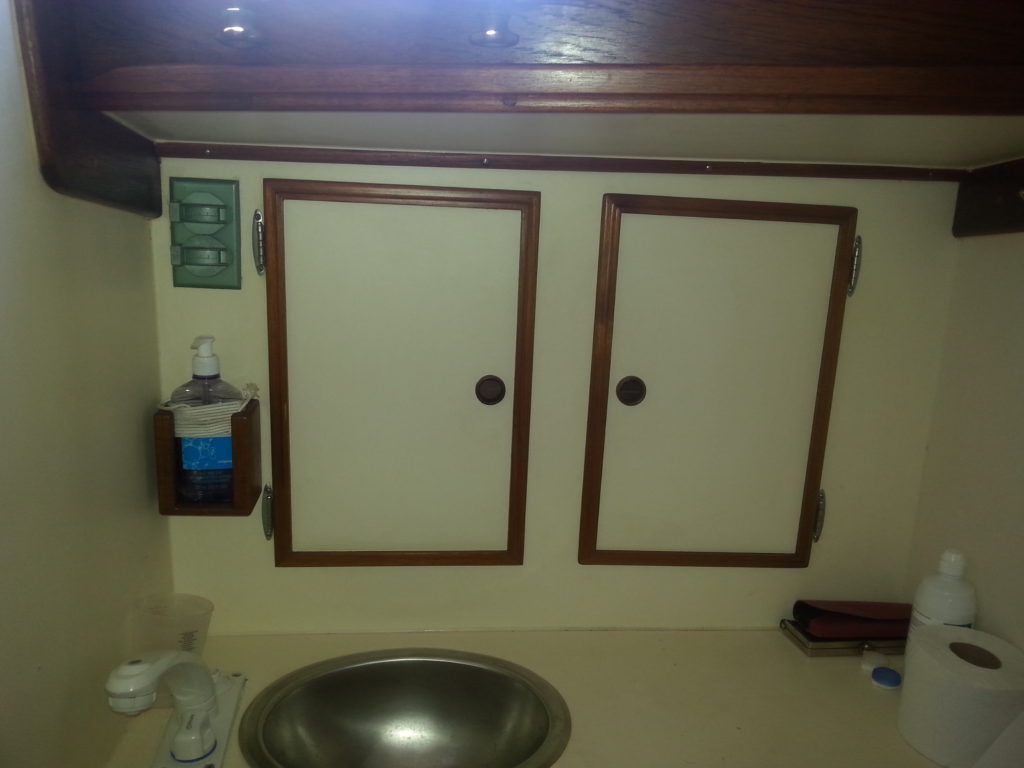
With the door closed, it looks great
Afterward
Having now worked with G-10, we will assuredly consider the material for other projects. It really is amazing, being strong and versatile.
We bought the multi-tool on a trip back to the USA without doing our normal research. We decided to risk buying the Harbor Freight tool over some more expensive models. We were just hoping it would last through this one project. It did, and it did quite well. We did find that the aluminum head would get quite hot after a couple hours of continuous cutting. A couple of times we had to let it cool as it started spitting grease from some internal bearing. It may not be the choice for all day professional usage, but it made it through our job with no noticeable damage. It will certainly come in handy on future projects. It’s small enough to stow aboard a cruising boat, and quite versatile in its usage. It’s one of those things that is not always needed, but if it’s there it will get used.
As we were preparing to start this project, we told people that we expected to spend anywhere between 3 days and 3 months. We came in at a little over 3 weeks. All in all it went as smoothly as could be expected. We really appreciate all the advice we received from friends, even the advice we didn’t use. You never really know where good ideas will come from.